
VIDEO
AVALANCHE MANAGEMENT USING THE D x C - M = R METHOD

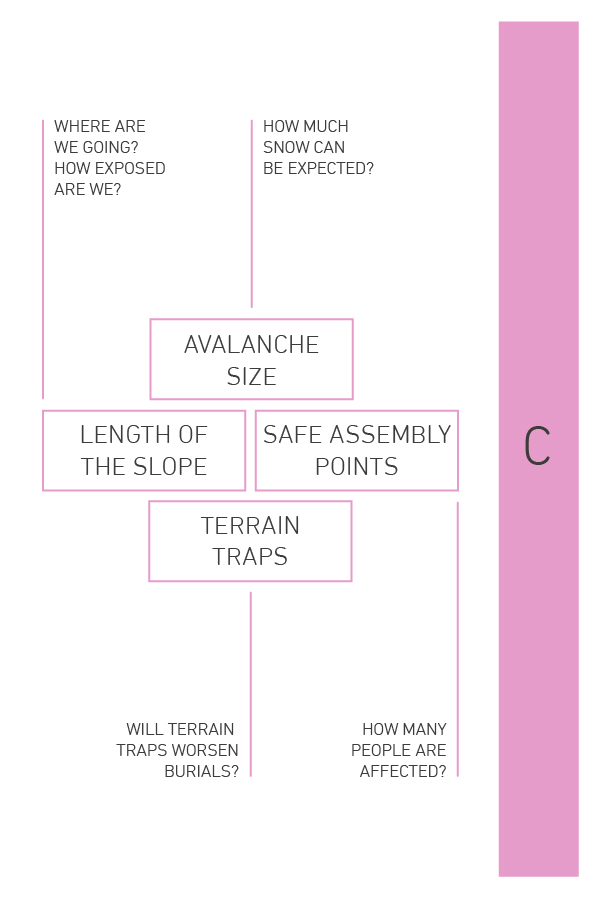
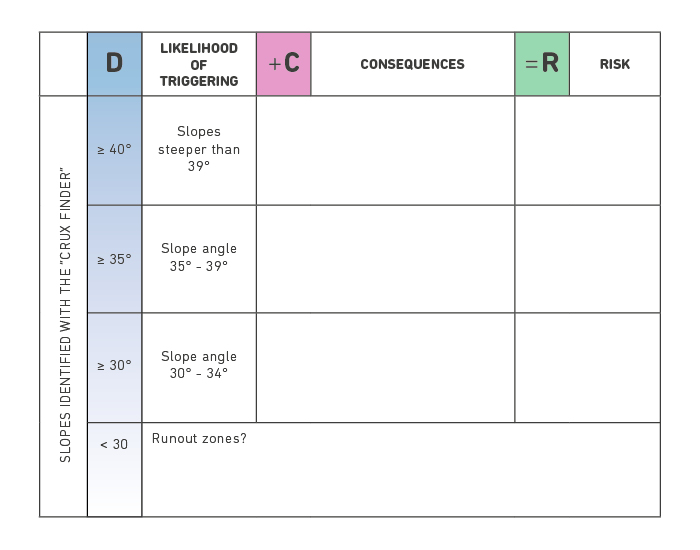
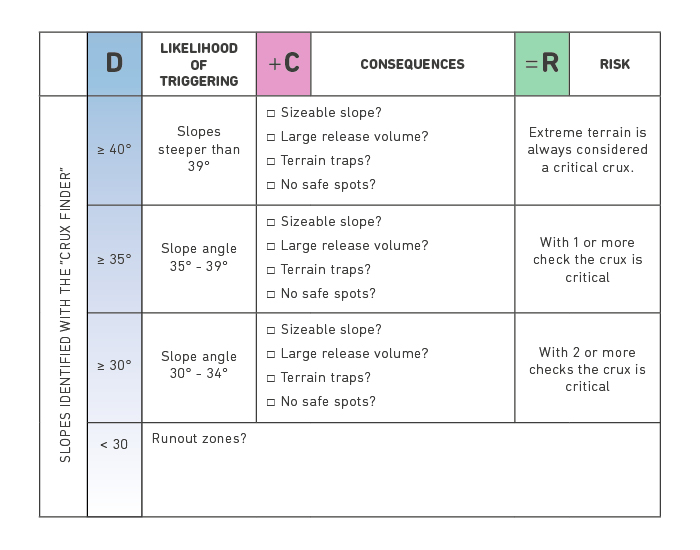
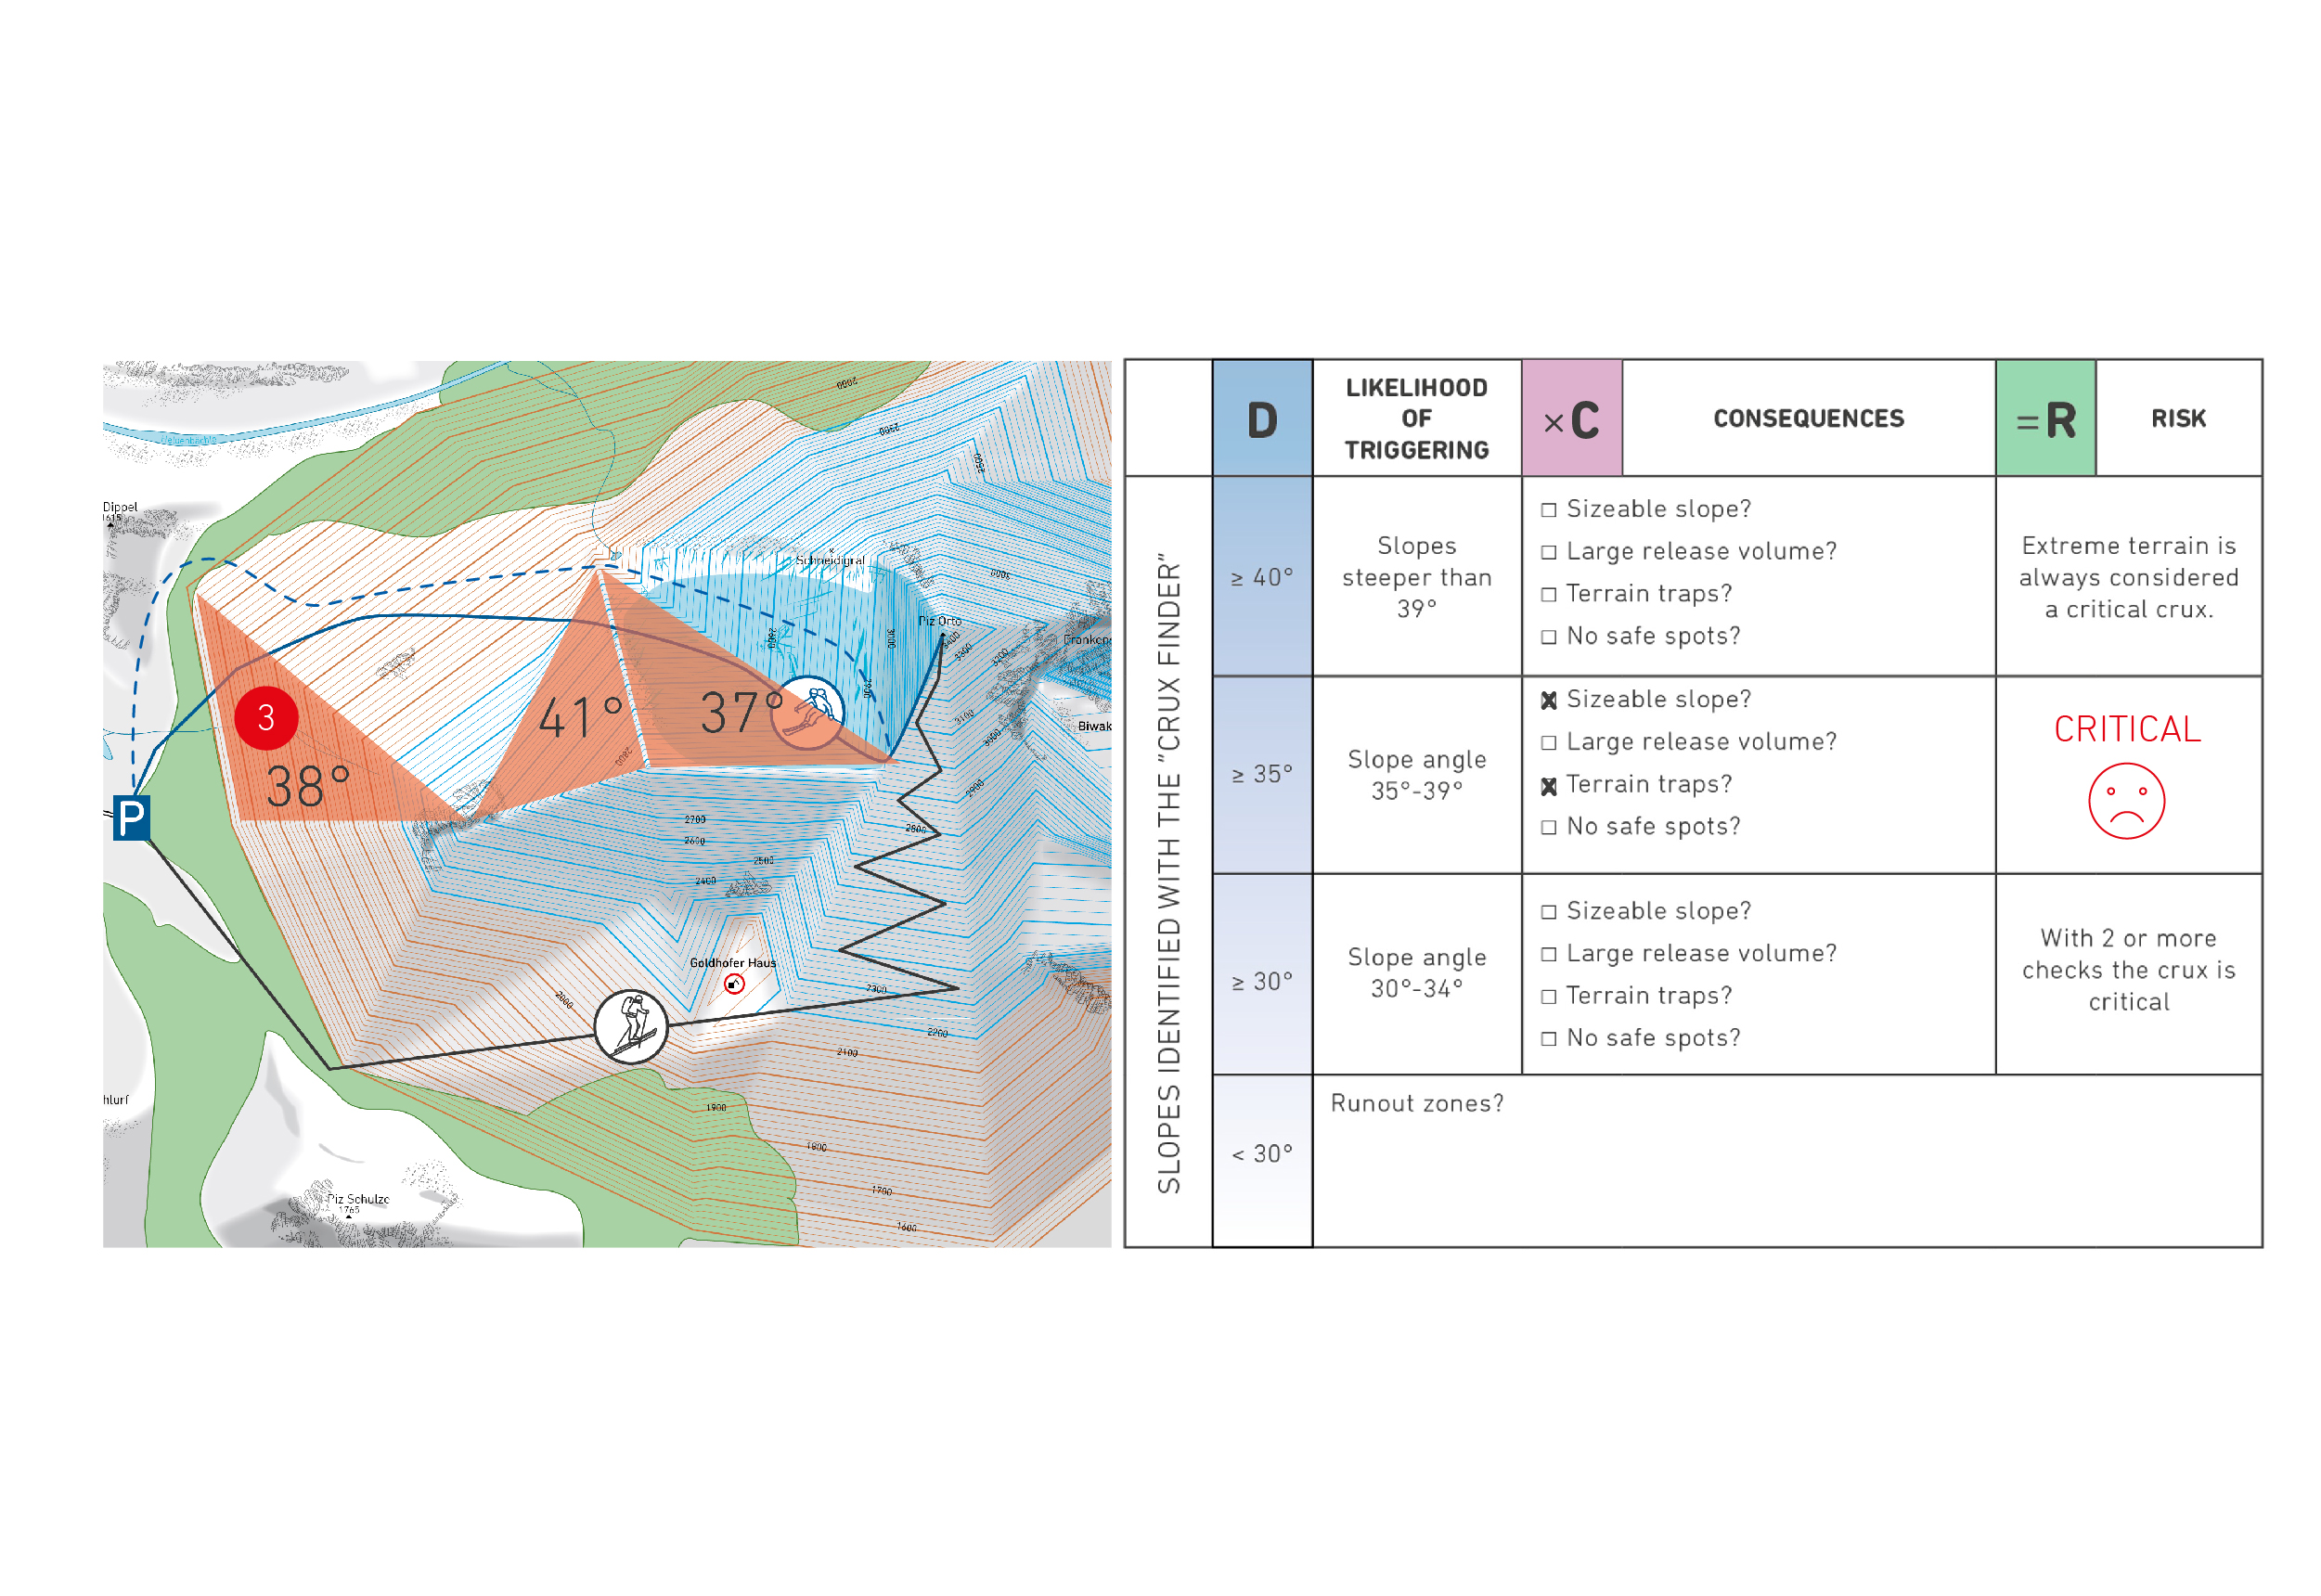
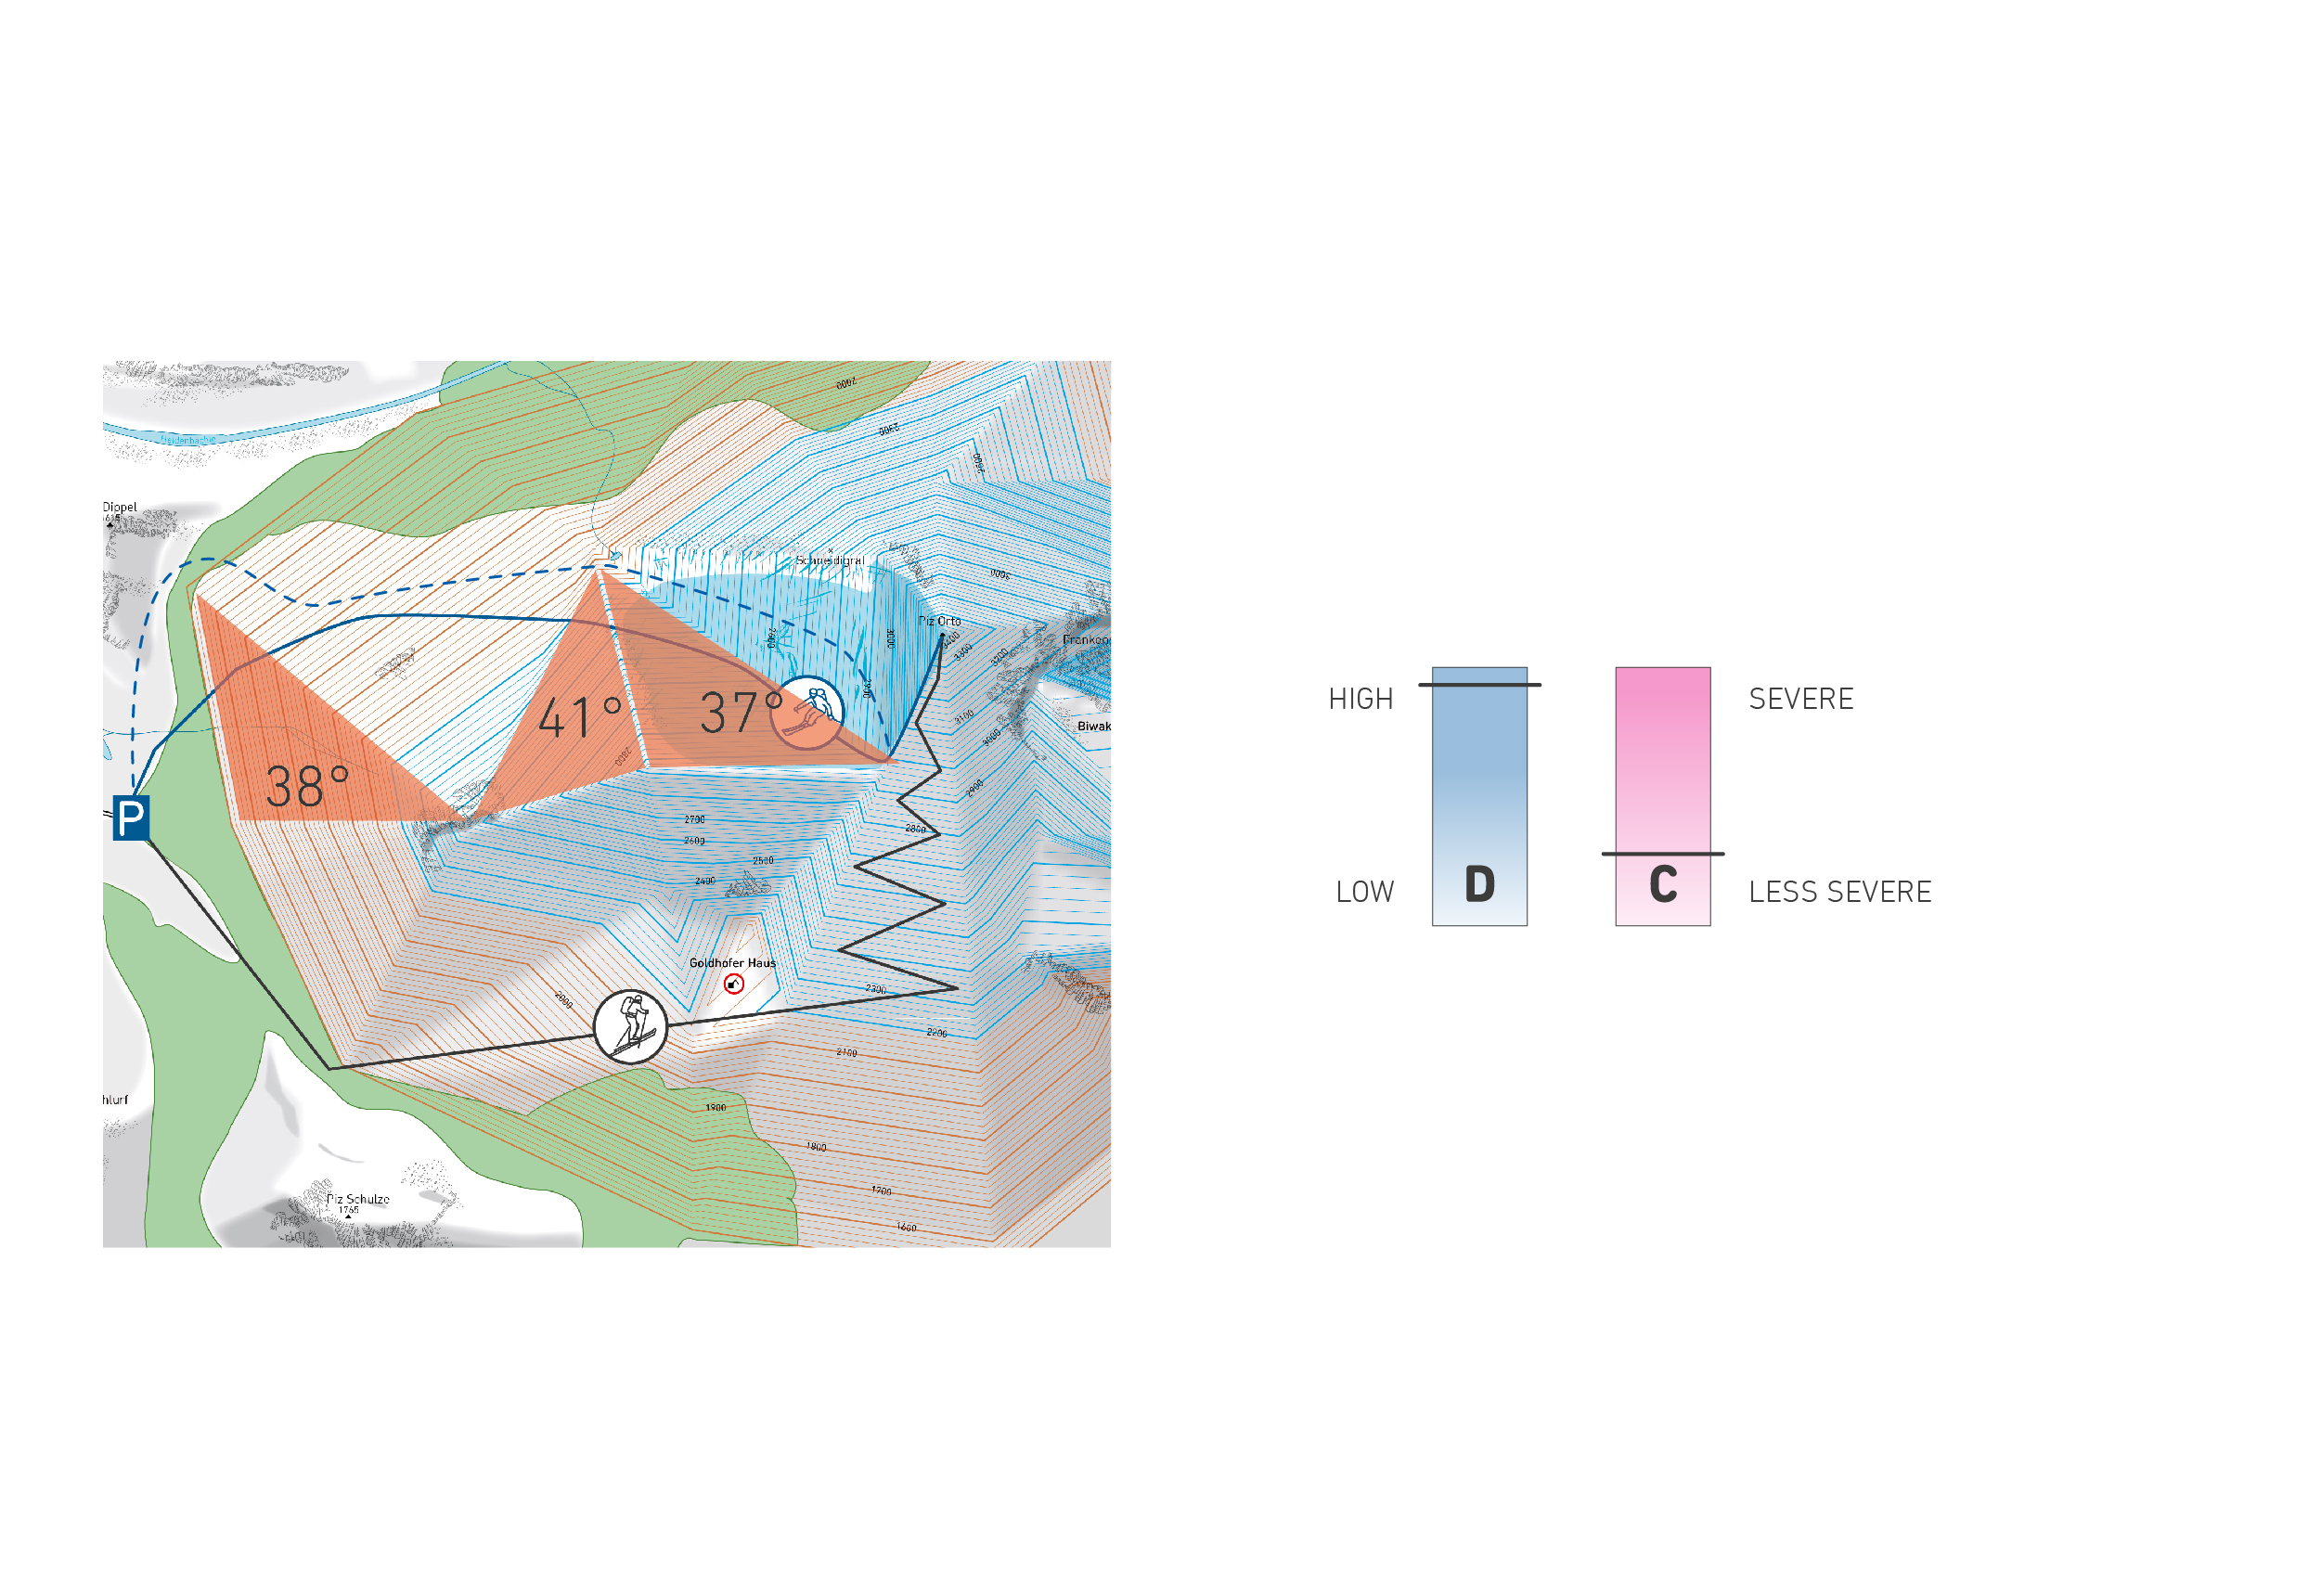
THE INTERPLAY OF DANGER AND CONSEQUENCES
Whether in the planning phase, in the mountains or on the individual slope – we always consider the danger (probability of an avalanche) and the resulting consequences. It is important to ask the right questions about the two factors and that we keep an eye on them both. Logically, at least one of the two factors must be low for the risk to remain at an acceptable level.
DANGER, CONSEQUENCES, MEASURES, RISK
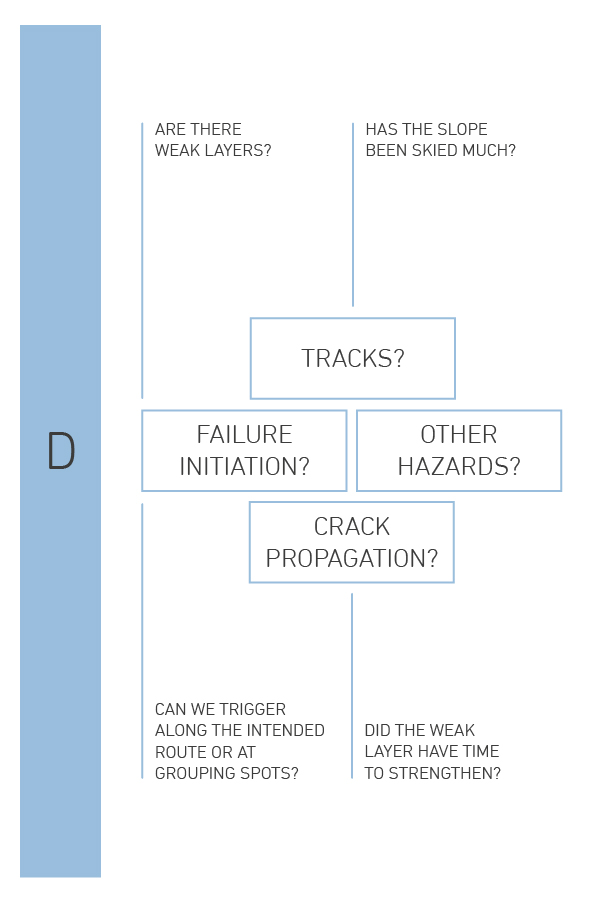
The probability of a slab avalanche is extremely difficult to estimate. We start with the four necessary “ingredients” for a snow slab and then ask ourselves simplified questions to help us estimate the probability.

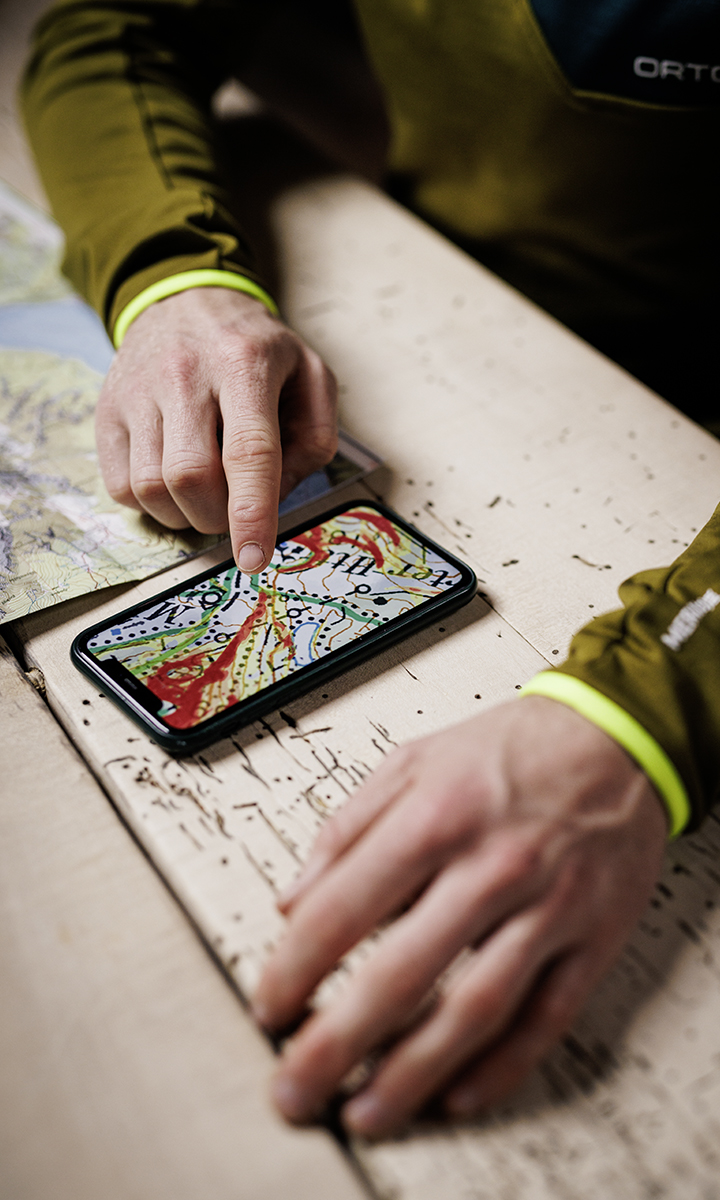
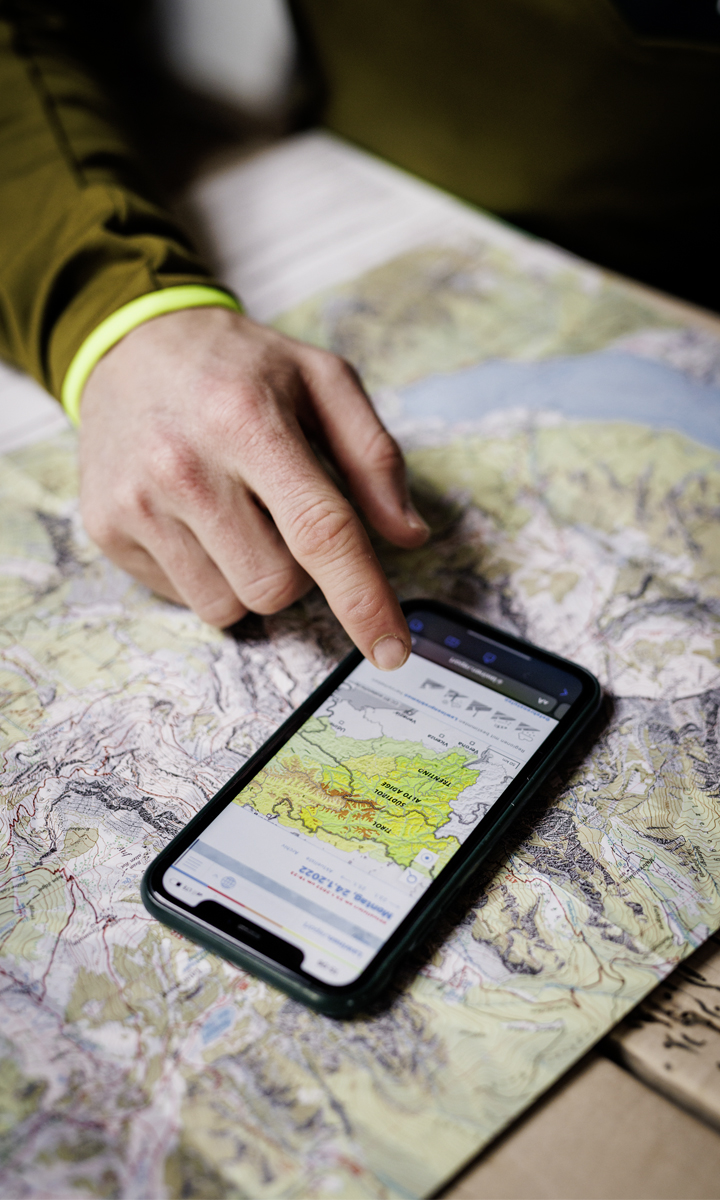
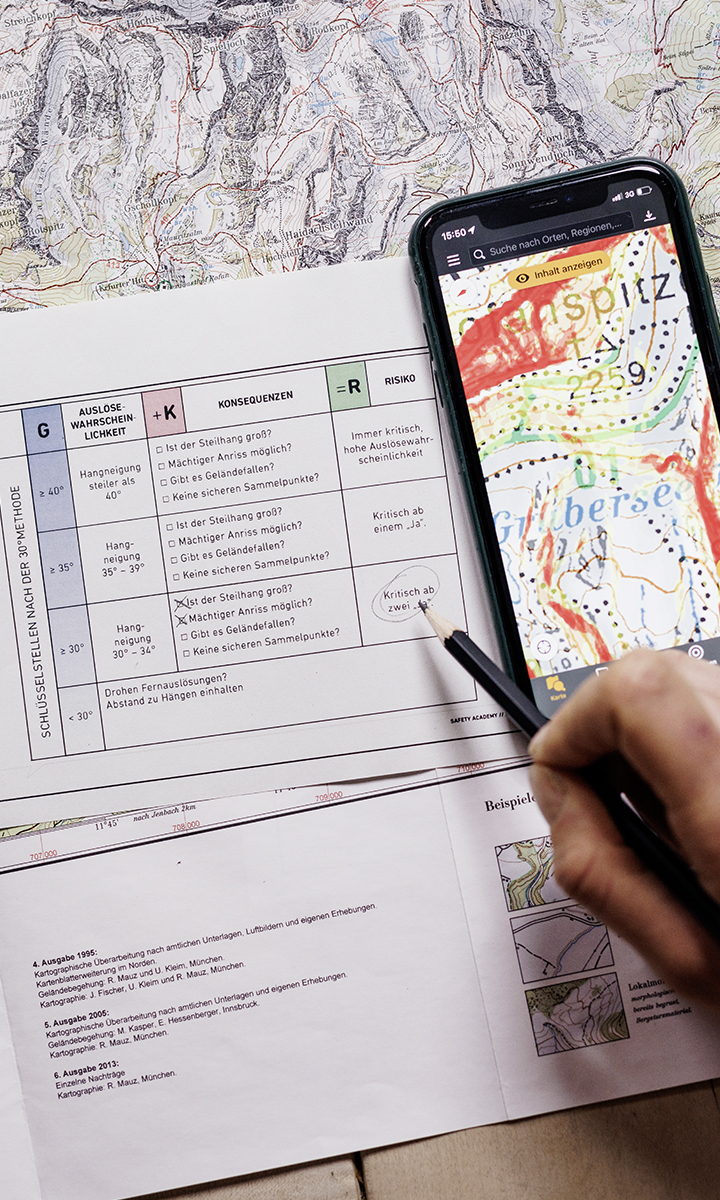
PRACTICAL TOUR PLANNING WITH THE HELP OF DCMR
The practical way to plan a tour using the DCMR method is to take it step by step:
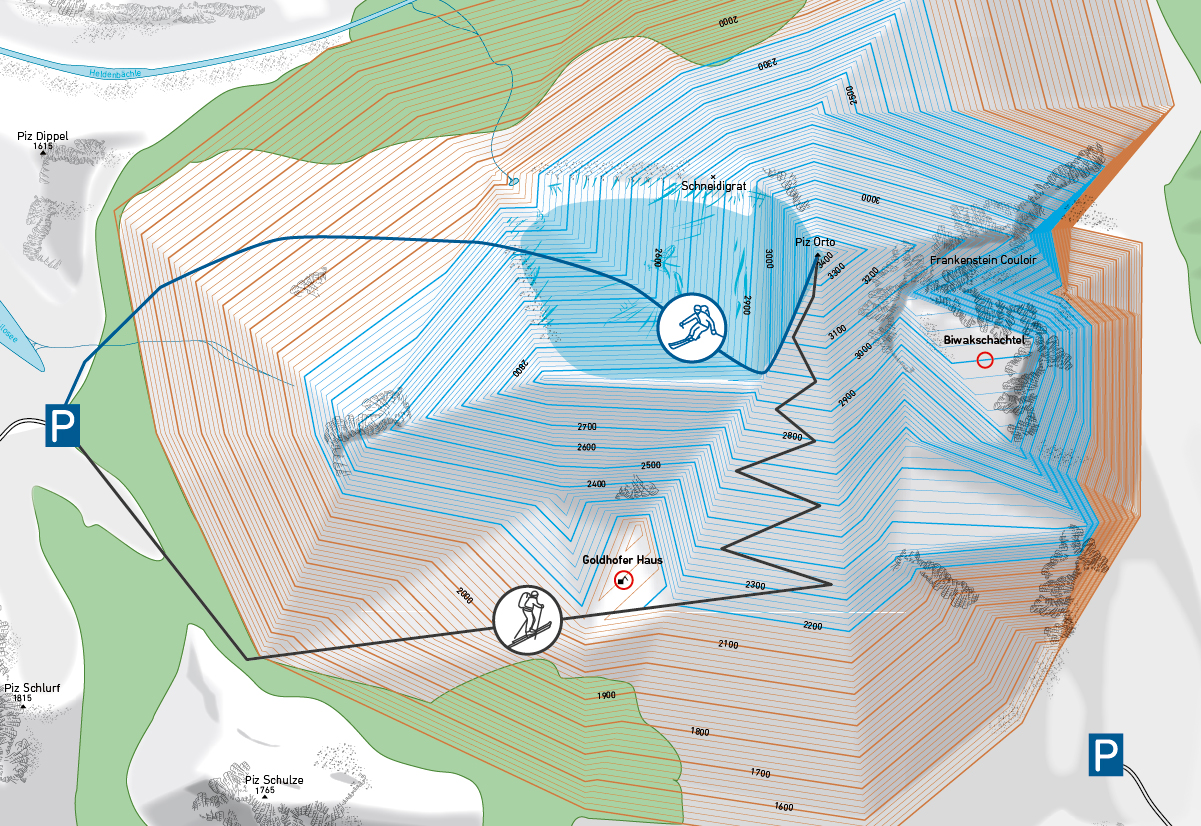
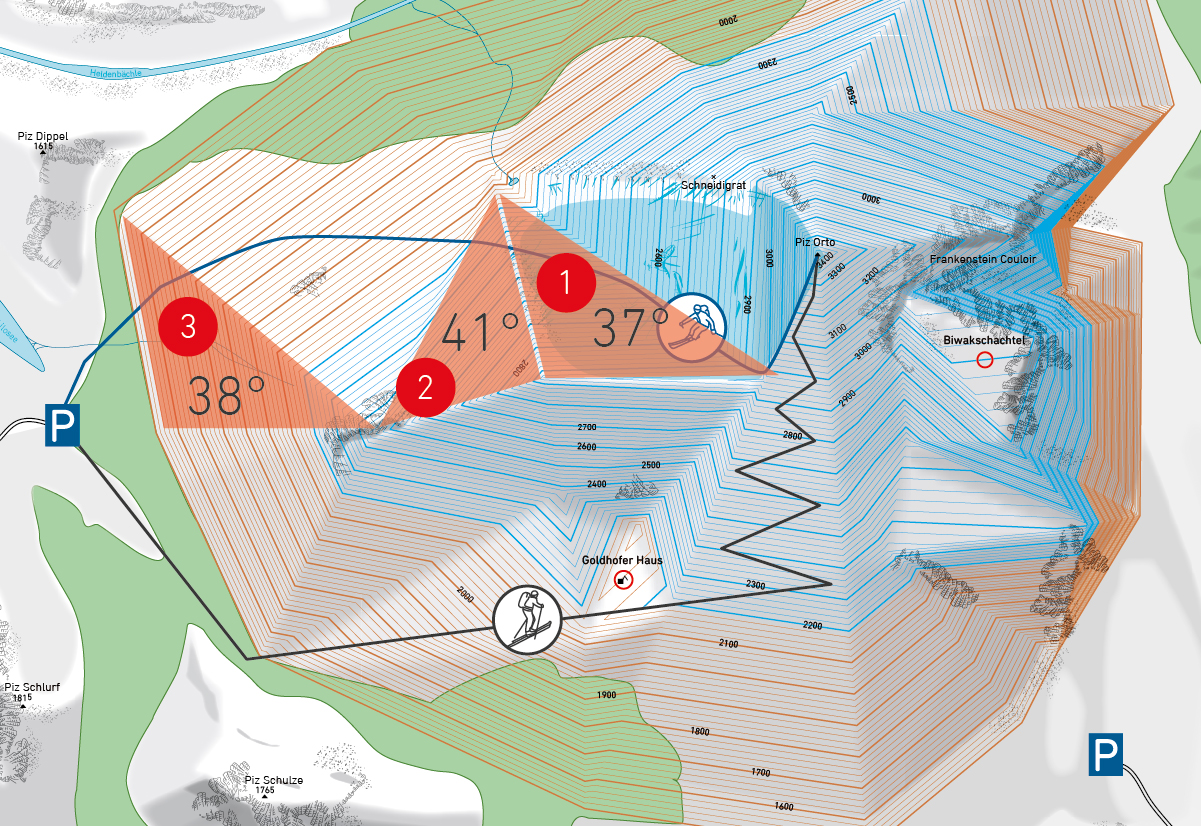
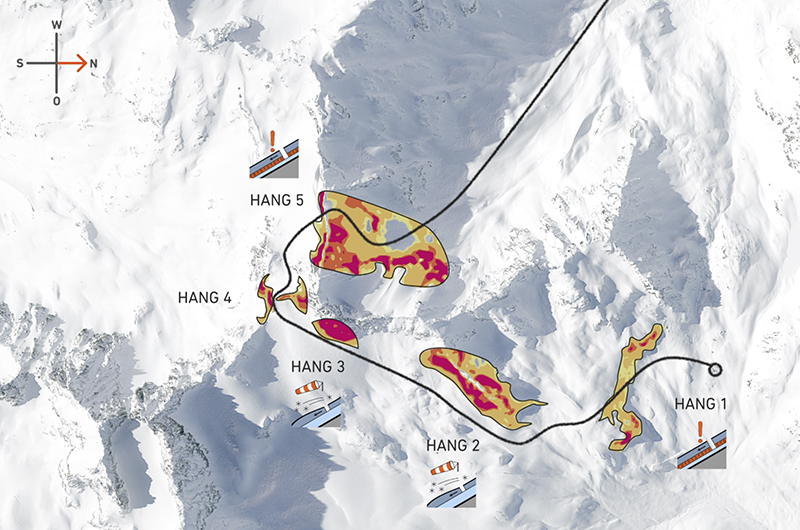
30° METHOD: IDENTIFYING CRUXES
The 30° method can be used to identify potential cruxes:
-
We filter out the slopes that are steeper than 30° and that we want to travel on or that have hazard zones we will travel through.
-
Slopes that are outside of the dangerous areas (core zones) listed in the avalanche bulletin can be “disarmed”, i.e. they are not counted among the cruxes. Because slab avalanches are observed almost exclusively on the slope aspects, elevations and terrain features mentioned in the avalanche bulletin. Therefore, all other areas can be considered fairly safe.
-
In addition, we can “disarm” slopes in our hazard zone that are above our route but that we will not directly travel on if they have wind-drifted or wet snow problems. This means: We do not include these slopes in our evaluation because remote triggering is observed almost exclusively when there are persistent weak layers or new snow problems; only then must we expect avalanches in the runout zone.


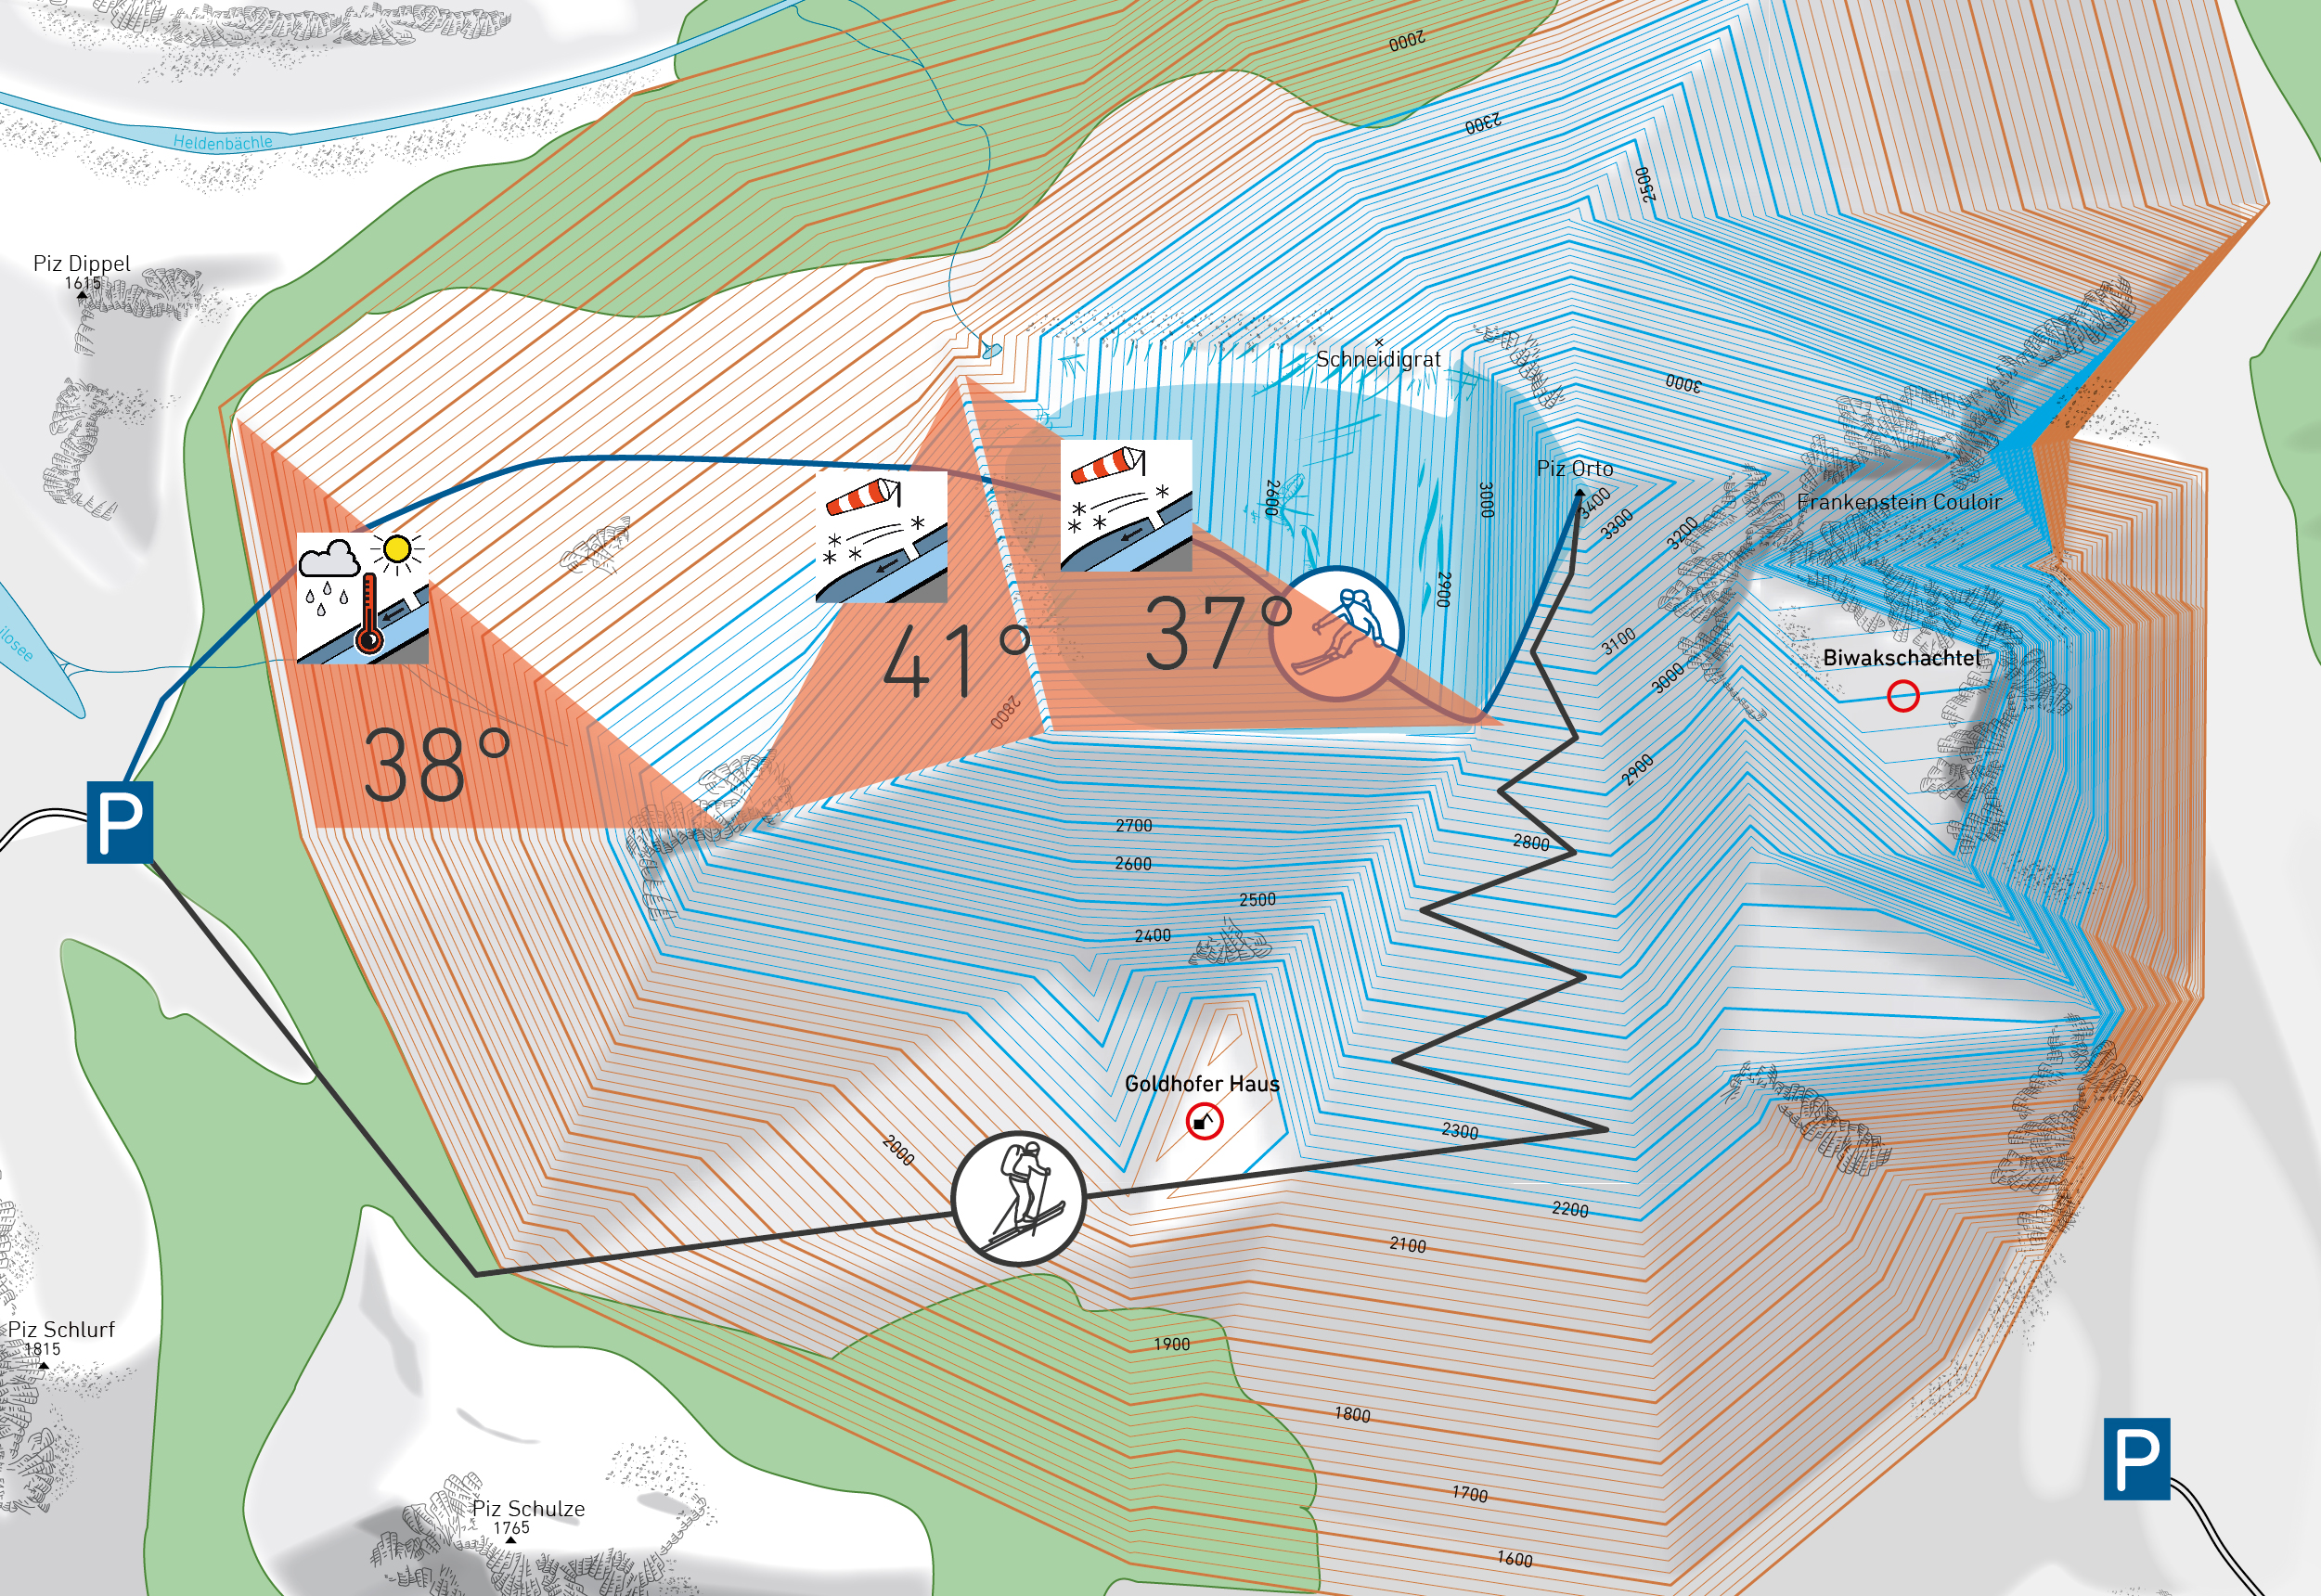
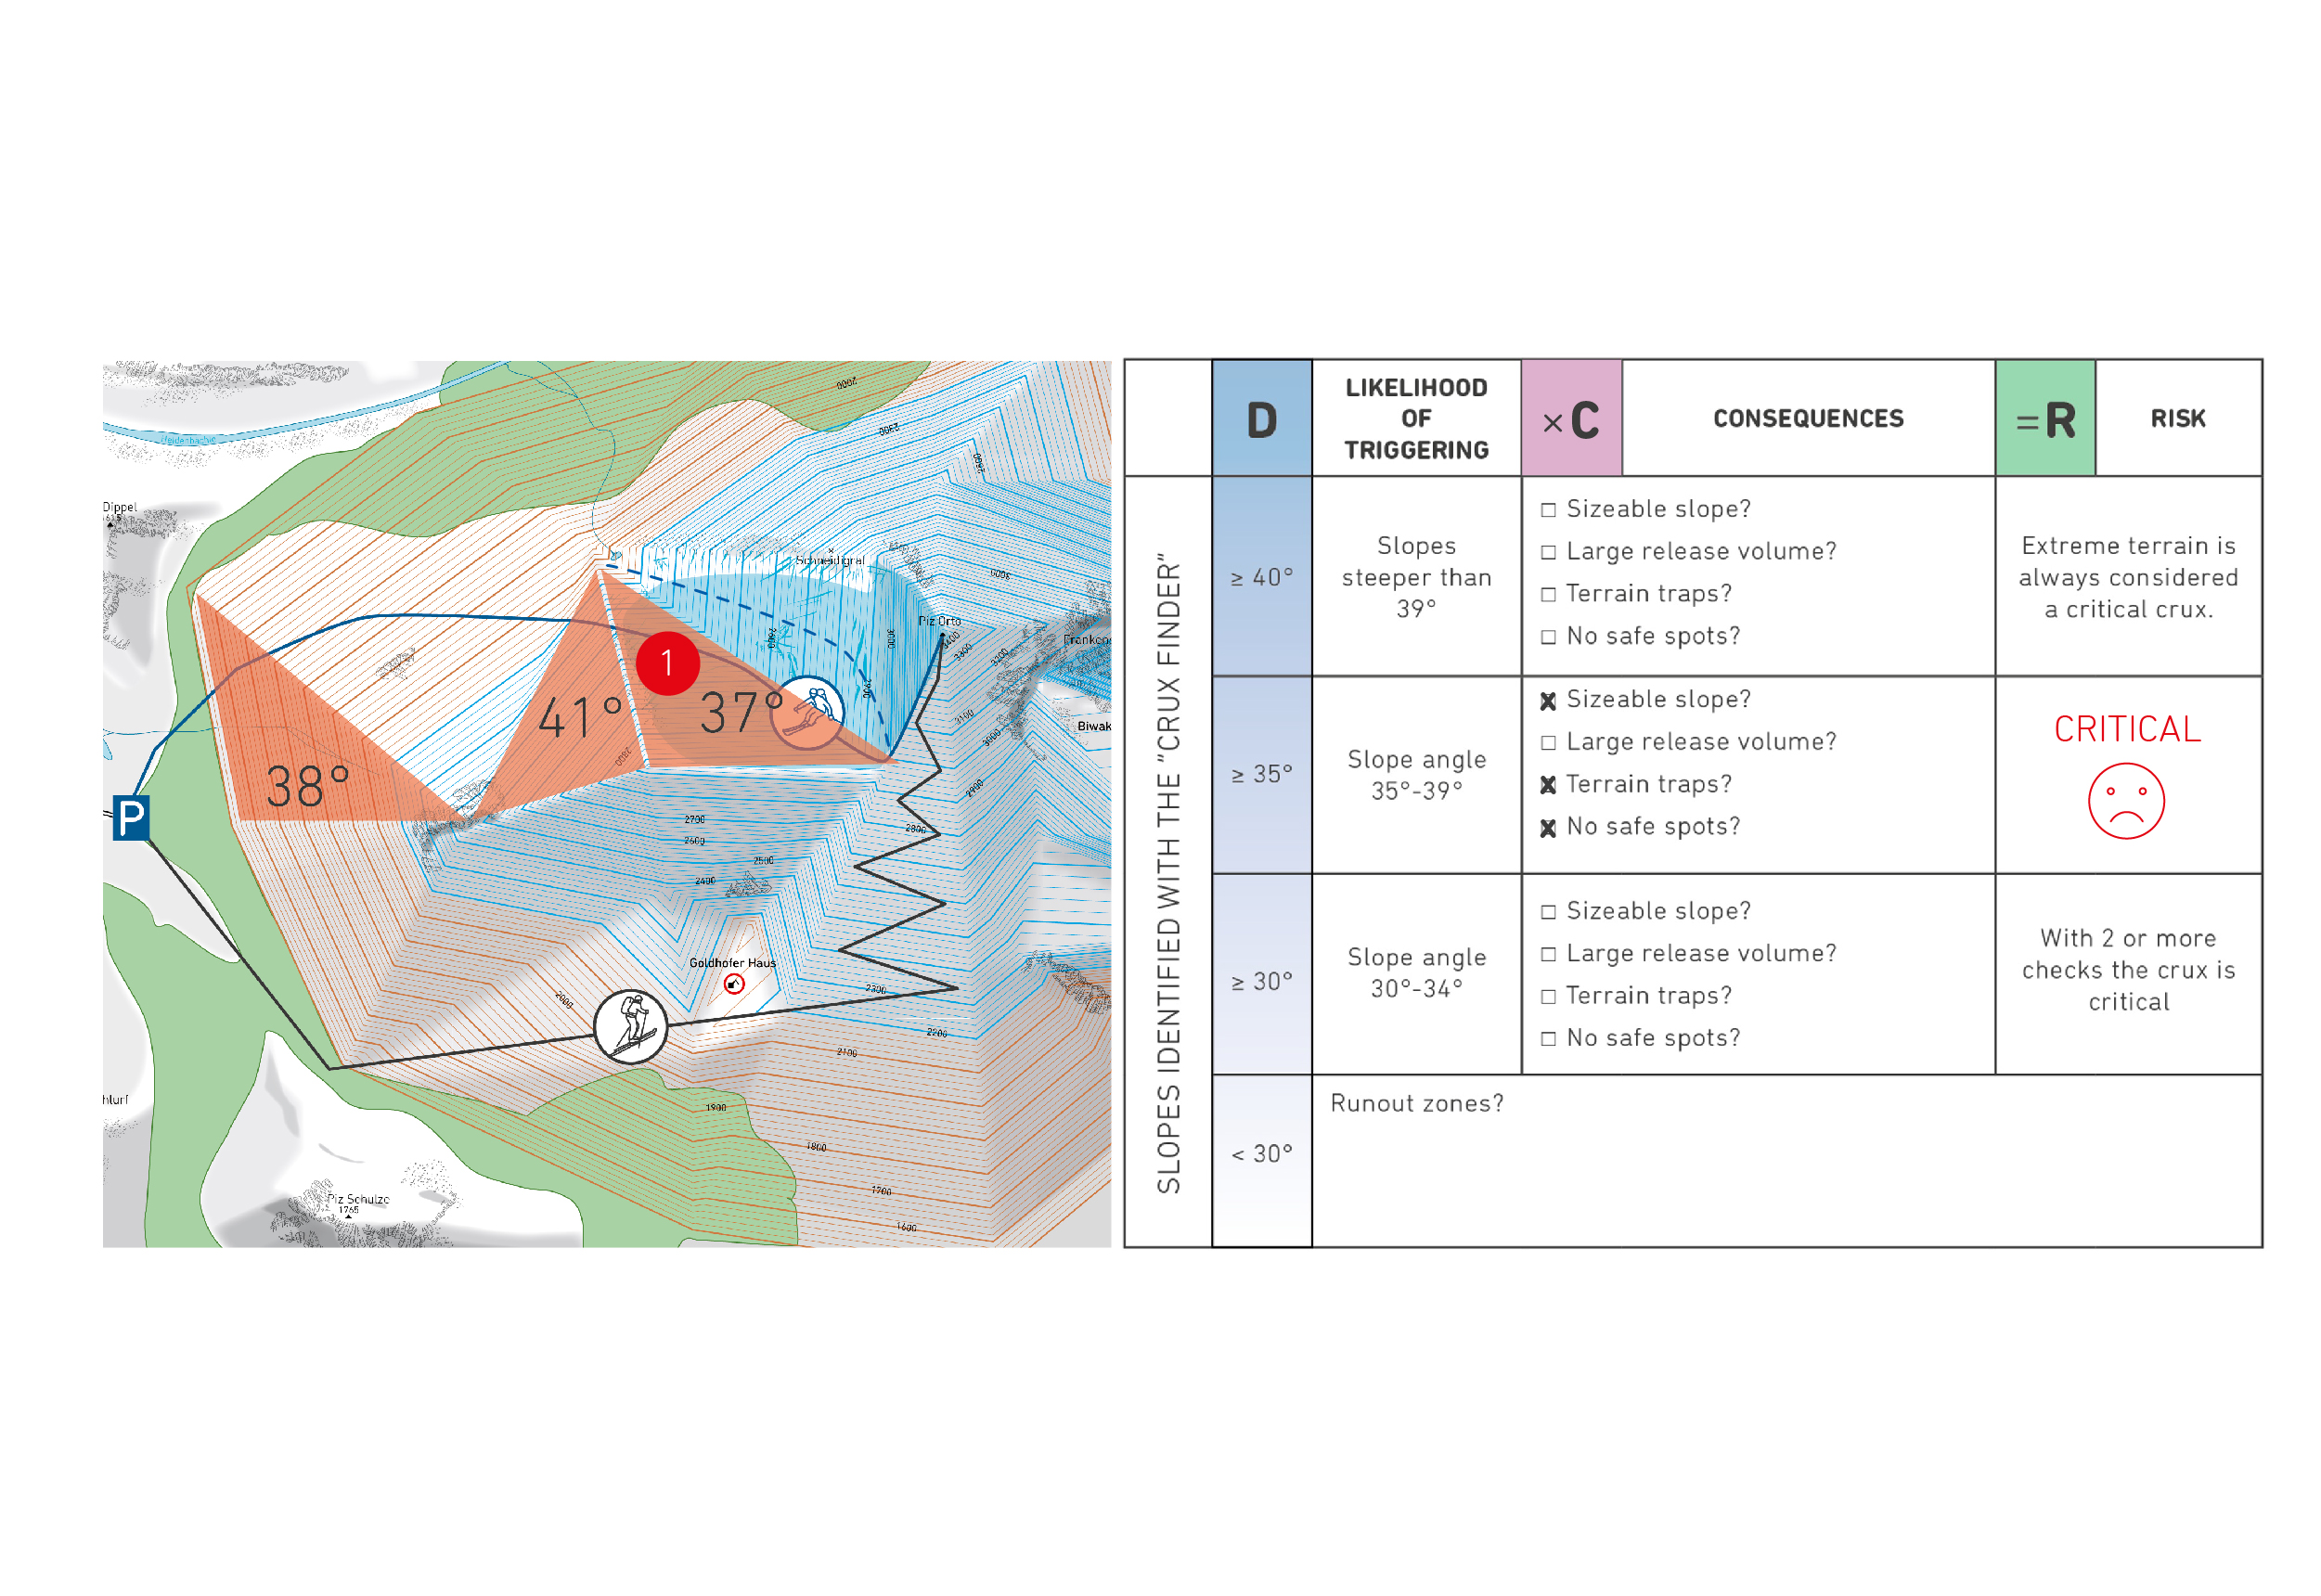
THE STEEPER THE SLOPE, THE MORE DANGEROUS
The widely cited “four ingredients” of a slab avalanche can be used to estimate the probability of an avalanche. These are:
- Is there a weak layer with a slab on top and can I disturb this (unfavorable layers)?
- Can the weak layer be stressed (initiation)?
- Can a crack in the weak layer propagate (crack propagation)?
- Is the slope steep enough for the slab to slide (>30°)?
In the planning phase at home, you know very little about the snowpack. So the first three questions are difficult to answer from a distance. In this phase, the only facts that can be determined are the slope steepness and whether the slope is in one of the dangerous areas identified in the avalanche bulletin.

QUIZ: 30° METHOD
The 30 degree method is used to identify dangerous areas and determine cruxes. This involves locating on the map all slopes 30 degrees or steeper along and above the route, regardless of the danger level.
NOW IT’S YOUR TURN!
The four building blocks of DCMR are: Recognize and assess Dangers; estimate Consequences; consider possible Measures; evaluate the Risk. The first thing to do is identify cruxes, i.e. determine the slopes where an avalanche could potentially occur. But how exactly do you do this?
Drag and drop the steps of the 30° method into the right order!

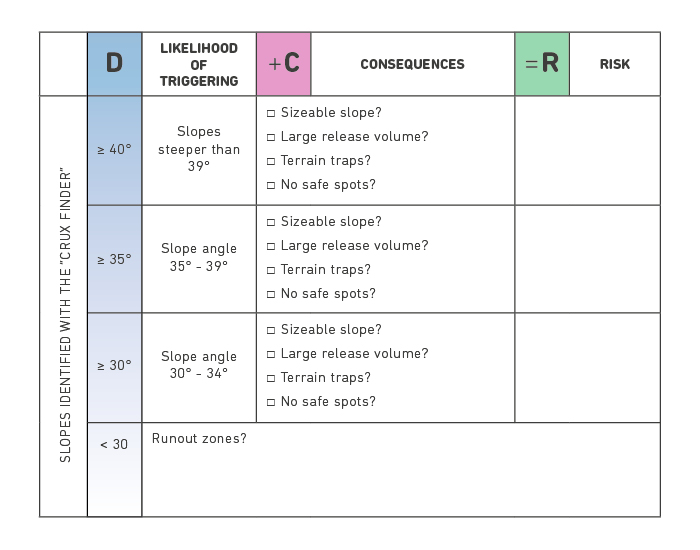
PRACTICAL AIDS TO DOWNLOAD
You can click on the following link to download practical tools that will help you identify cruxes when planning a tour, link dangers and consequences and then assess the resulting risk.