Subchapter: Alpine climbing knowledge
Alpine climbing knowledge
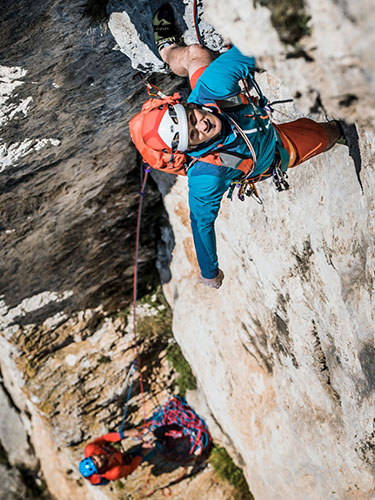
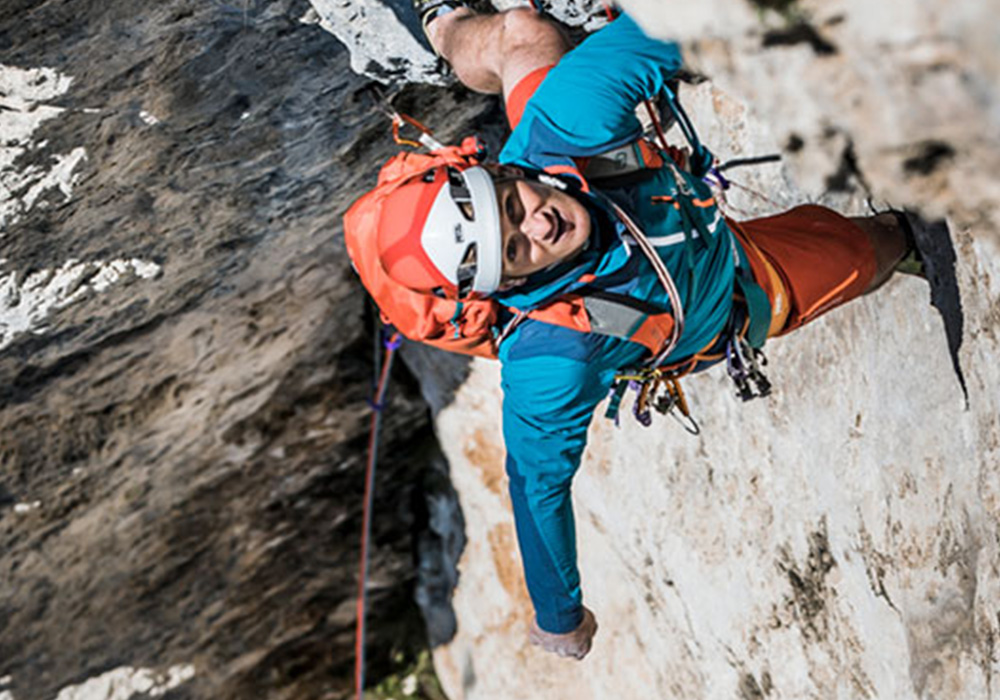
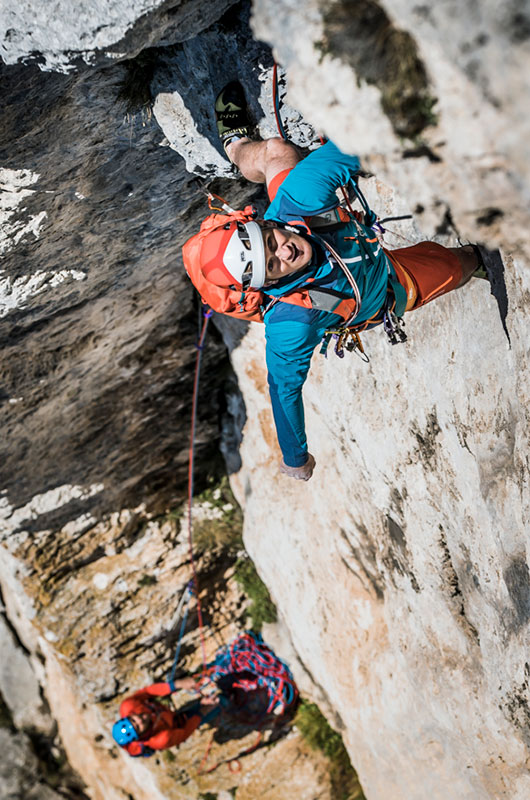
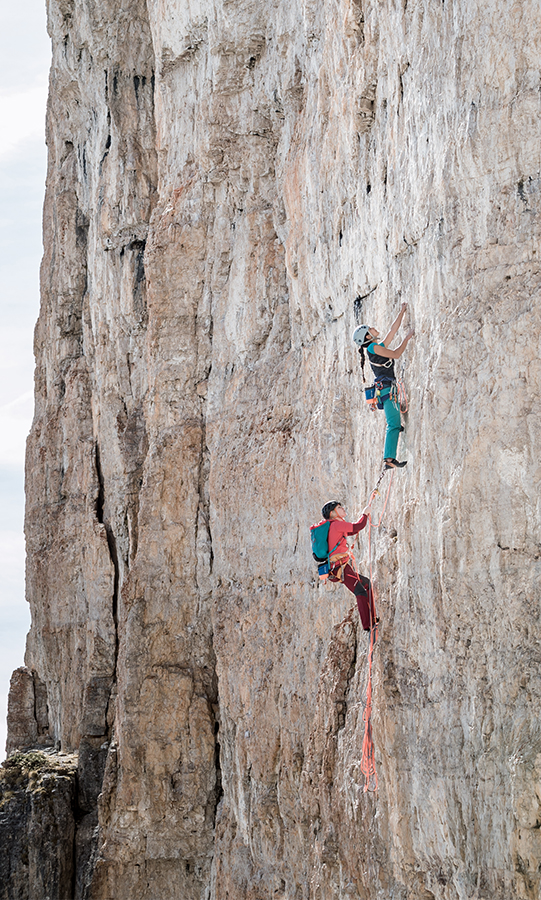
Tactics: On the rock face
You and your rope partner are about to start your climb. You now need to set some ground rules for before and during the climb.
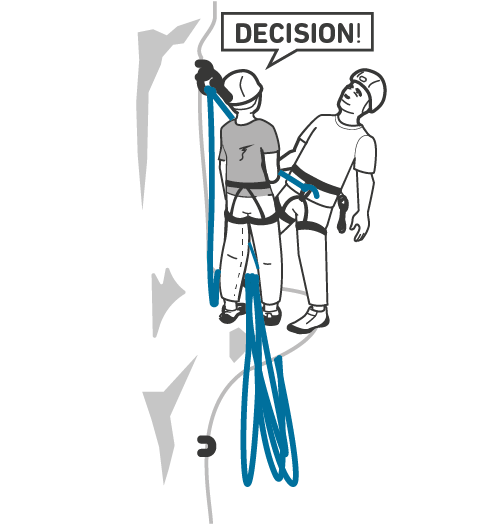
The partner check is a fundamental step before the rope team can get climbing. Every rope team must also decide for themselves whether they’re going to climb in crossover formation or using the caterpillar technique. Only when the rope team works seamlessly, with the correct rope commands and the correct clipping can the rope team move quickly and efficiently. If despite good preparation the follower gets into trouble on the rock face, it is important that the climbers have mastered methods such as the express pulley to provide quick help. Finally, clean rope handling is the mark of a good rope team, and helps avoid wasting time and critical situations.
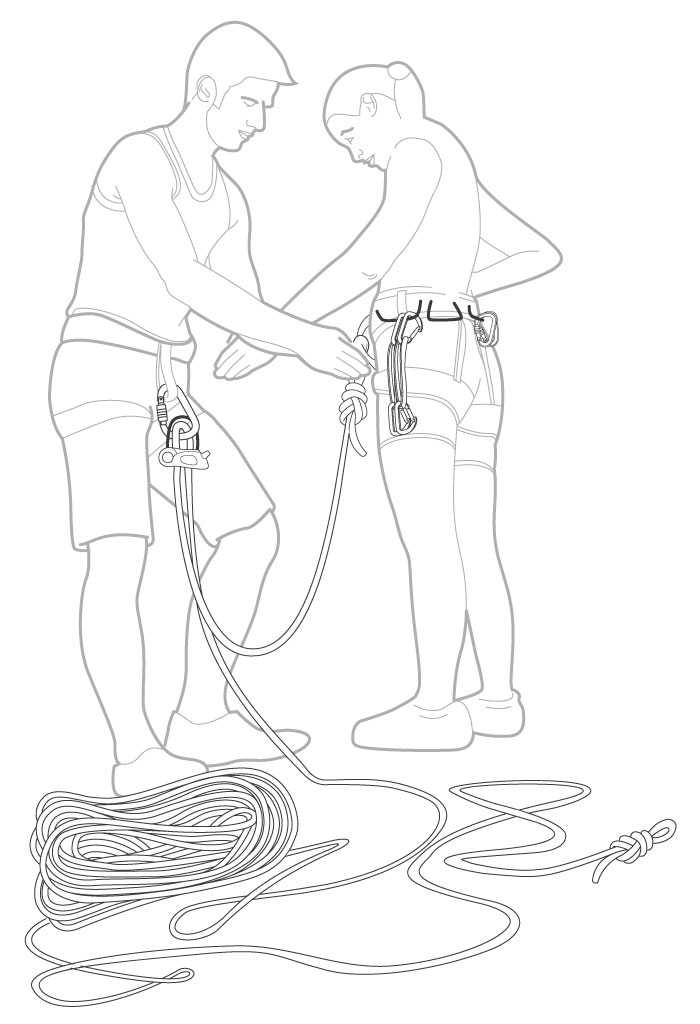
Partner check
The partner check is important for any rope team before setting out: It is an important component of climbing, be it sport and alpine climbing, ice and mixed climbing or an alpine tour. During the partner check, each climber checks him/herself as well as their partner. Particularly when it comes to routine activities, small mistakes can go unnoticed and have fatal consequences on a vertical rock face.

Seamless rope team cooperation
The helmet is properly fitted and the partner check has been fully carried out. Now it’s time to get started: If the climbers in the rope team cross each other, this means the lead climber and follower alternate. For the following pitch, the follower takes the lead. At the next belay, they switch once again. However, if there is only one lead climber, who takes the lead for every pitch, this is considered a permanent lead. Rope handling and belaying must be adapted accordingly.
The same rope commands are valid for both tactics. With these commands, each rope partner knows what he/she has to do. In well-attuned rope teams – or during alpine climbs where the rope team can no longer hear each other – the commands can be transmitted by pulling on the ropes.
In the following section we look at the processes for a two-person rope team from the perspective of the lead and follower:

The lead climber starts climbing and has the first anchor or protection point in view. If there are no pitons in sight, traditional climbing equipment is used.
When doing so, make sure to clip from a stable, not-overextended position.

The follower belays attentively and also ensures the rope runs cleanly. When the protection point has been clipped, the follower leaves enough rope for the lead climber in good time.

The lead climber has reached the belay. He/she chooses an anchoring method according to the number and quality of anchors. Once the anchor has been set up and he/she has clipped onto the personal anchor, he/she gives the first rope command: “OFF BELAY”.
NOTE: If there are multiple rope teams close by, the climber shouts the name of his/her rope partner after the command. Otherwise this can lead to misunderstandings for nearby rope teams.

As soon as the follower hears the rope command “off belay”, he/she undoes the partner belay and shouts: “ROPE FREE”.

The climber at the anchor pulls the rope in quickly and cleanly. Where possible, the rope should be placed in a pile on a base. In a hanging belay, the rope must be arranged in loops that start larger and become progressively smaller, and placed above the climber’s feet, over the personal anchor or in a sling. This means the rope cannot slip down when protecting the lead climber in the next pitch. If the rope has “RUN OUT”, the lead climber clips onto the partner's belay. The rope command then follows: “CLIMB WHEN READY”

Only when the lead climber has shouted “CLIMB WHEN READY” does the follower unclip him/herself from their personal anchor. Now he/she can dissemble the anchor and follow. Right before climbing he/she shouts: “CLIMBING”.

Once the rope is no longer tensed, the lead climber knows that the second climber has started climbing. He/she pulls the rope in gradually, taking care to handle the rope cleanly.

When following, the climber unclips all protection points and dissembles the mobile anchors set up by the lead climber. He/she always has the nut remover within reach.

Lead climber: When alternating the lead climber, the follower switches to become the lead climber. Once the follower has arrived at the belay, the rope partner tells him/her the best place to position him/herself and gives the new lead climber the remaining equipment for the next pitch. The lead climber’s belay must be adapted according to the anchor technique.
Follower: Once the follower has arrived at the belay, he/she gets comfortable and sets up his/her own personal anchor using a clove hitch in the rope or a sling. He/she gets into position, takes the lead climber’s equipment and looks at the next pitch in the topographic map. If the rope partner has him/her in the belay, the new lead climber can prepare to climb.

Lead climber: If the lead climber continues to lead for the next pitch, this is considered a permanent lead.
Once the follower has arrived at the belay, the rope partner tells him/her the best place to position him/herself and clip on his/her personal anchor. He/she takes from the follower all the equipment that he/she has taken from the rock face. If the second climber is well placed to do so, the lead climber gives him/her the rope. Ideally the rope is run through once more, so that the end of the lead climber’s rope comes from above out of the rope pile. In a hanging belay, the rope must also be pulled through and placed above the climber’s feet, over the personal anchor or in a sling.
Follower: Once the follower has arrived at the belay, he/she gets comfortable and sets up his/her own personal anchor. He/she is positioned so that the lead climber can easily continue climbing. He/she gives the equipment he/she has collected to the lead climber, while also taking the rope and setting up the lead climber’s belay.
Lead climbing
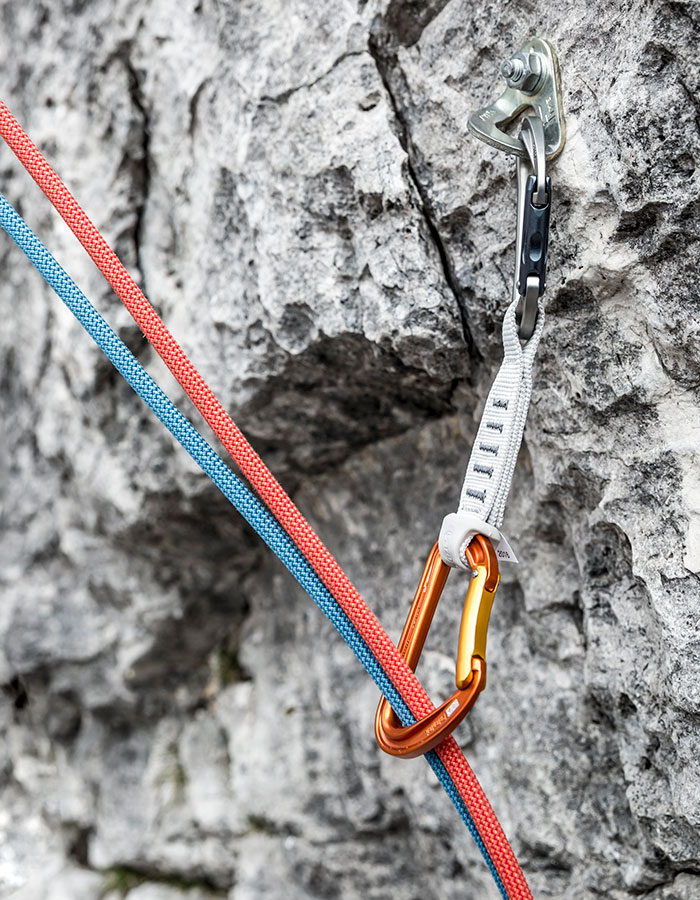
PLACING PROTECTION AND ROPE TECHNIQUE
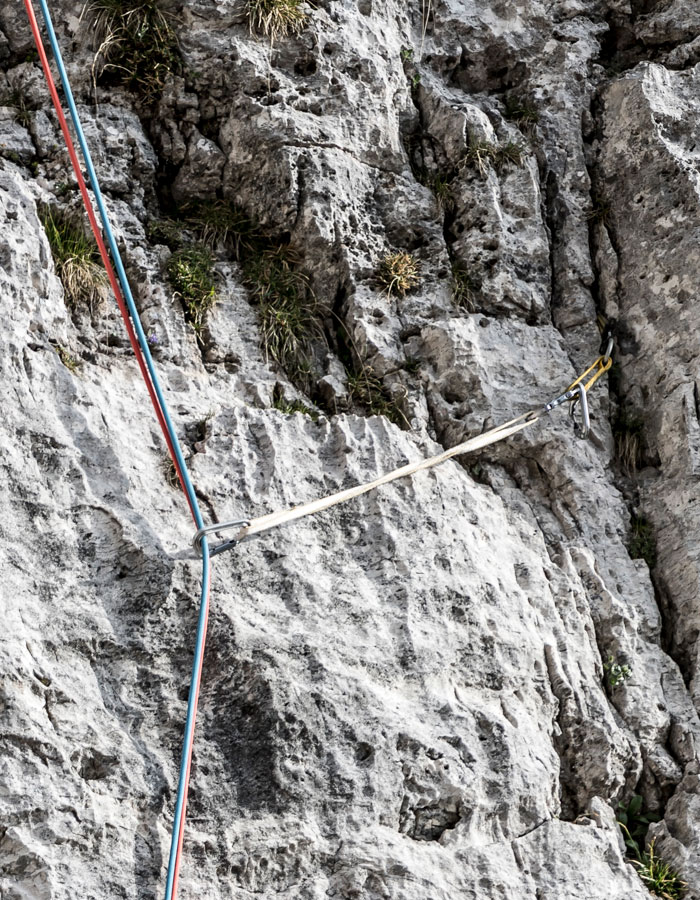
The lead climber must aim to ensure a rope path that is as straight and as friction-free as possible. When clipping, the rope should be fed through the quickdraws. In addition, the rope must be around the body: The climber’s leg should never be behind the rope, because in the event of a fall the climber can fall in an upside-down position. This could result in severe impact injuries as well as burns from rope friction.
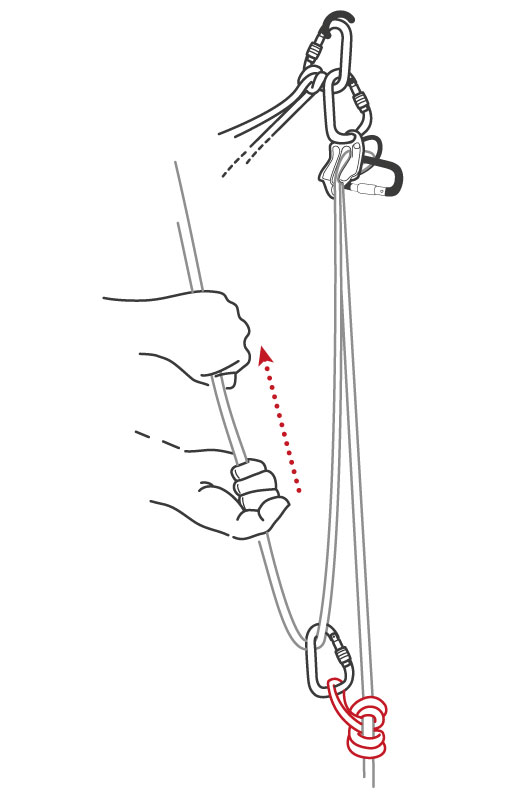
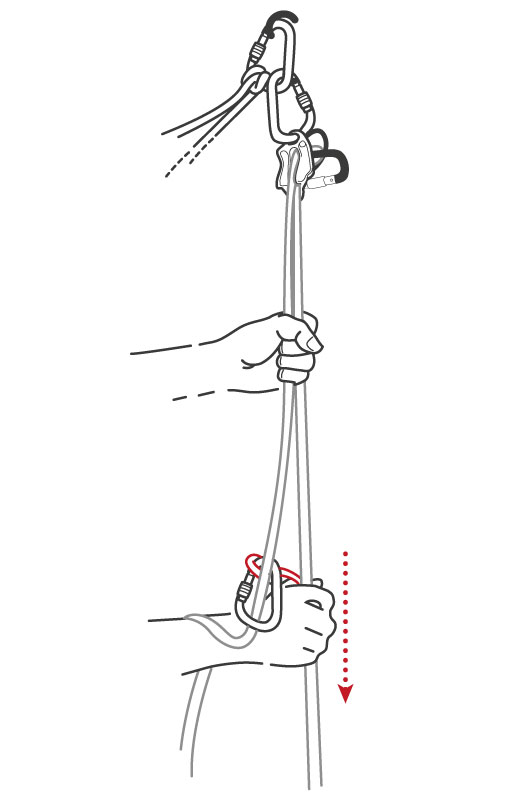
RESCUE METHODS:
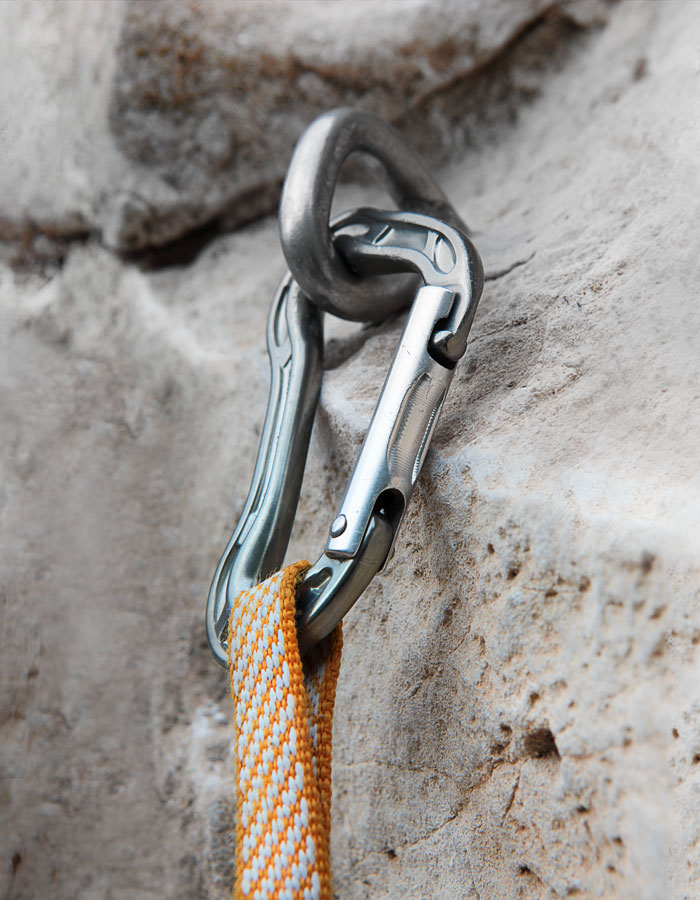
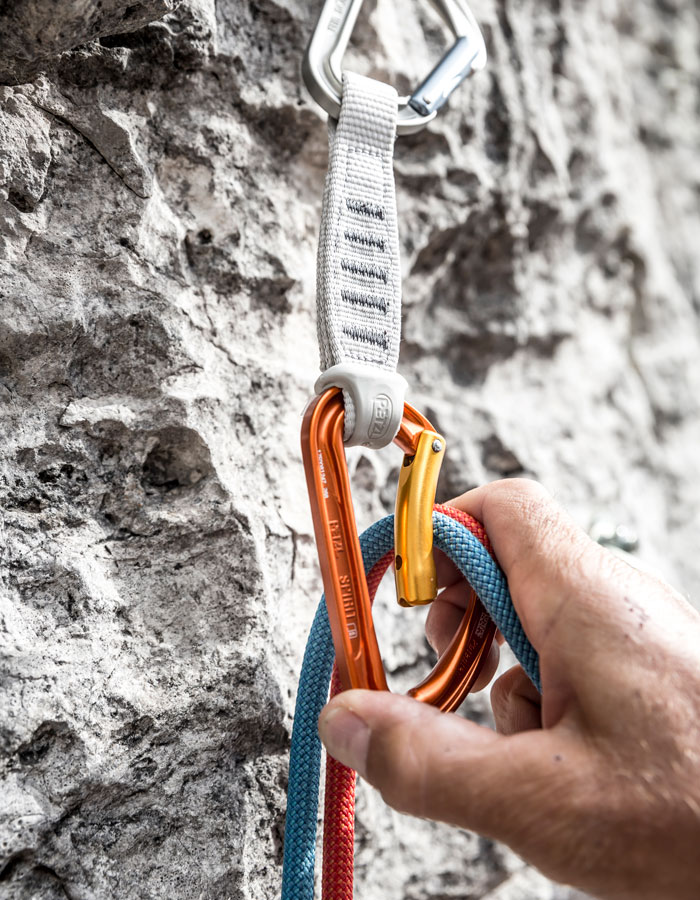
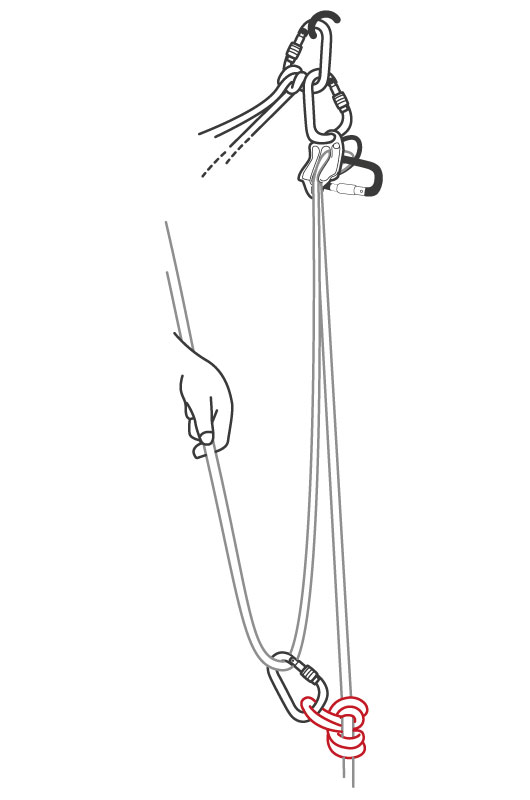
Express Pulley
An express pulley is a rescue technique, although it is much more often used as a pulling aid. If your rope partner is having difficulties at a specific point in the second climb, an express pulley can help to give more traction. This means you can help your rope partner quickly and effectively in an emergency.
Video
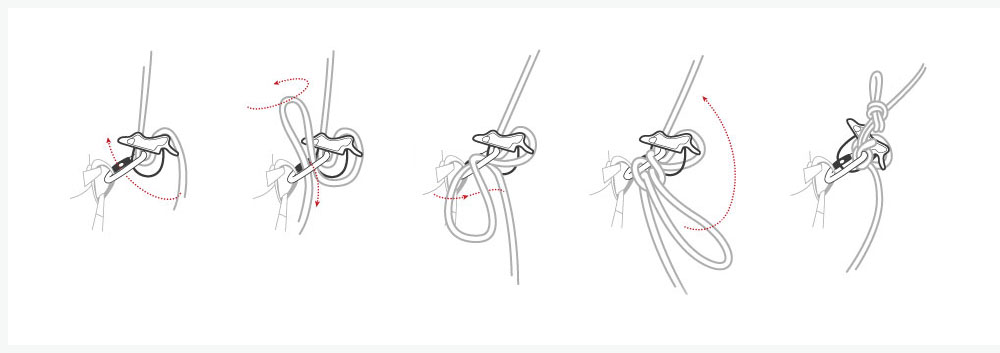
Coiling a climbing rope
Coiling a climbing rope
The rope is the climber’s life insurance policy. The climber must work carefully when climbing, but he/she must be just as careful when coiling the rope. Kinks and knots don’t just waste time on the rock face – they also damage the rope. The rope must therefore be checked for weak spots every time it is coiled. If the rope is damaged, it must be replaced without delay.
When coiling the rope the climber may use a different method according to his/her preferences: From the middle or the end of the rope, from the hand or over the shoulder. During alpine climbs it is helpful to coil the rope so that the climber can carry it comfortably and securely during ascent and descent.
FROM THE CENTER
If the climber picks up the rope from the center, this will encourage kinks to form on their own at the end of the rope. First you look for the midpoint marking. Then – beginning in the center – the mirrored loops are wrapped in the climber’s hand or around his/her shoulder. The loops are coiled from one side to the other until there are two meters of rope remaining. The climber then wraps this very tightly around the loops of rope several times before pulling a loop through the hole. This loop is then placed on top of the upper part. Finally, both ends of the rope are pulled through.
FROM THE END OF THE ROPE
Coiling the rope is quick and easy from the ends of the rope The rope is coiled loop by loop over the climber’s hand or his/her shoulder until there are around two meters left to the other end of the rope. The climber then wraps this end several times around the loops of rope very tightly before pulling a loop through the hole. The loop is then placed over the upper part of the rope. Finally, the end of the rope is pulled through tightly.
BUTTERFLY COIL
A butterfly coil can be prepared using both methods. From the center: If the climber has coiled the rope, there must be at least three or four meters left at the end of the rope. The climber now wraps the rope ends very tightly around the loops of rope several times before finally pulling a loop through the hole. This loop is then placed on top of the upper part and the ends of the rope pulled through tightly. Now the rope can be carried on the climber’s back. The ends of the rope should be placed over the shoulders onto the climber’s chest and then go under the diagonal armpit back to the rope coil. Then the rope is pulled back through from behind and tied at the stomach.
If the rope has been coiled from the end of the rope, there must be at least three meters left at both ends of the rope. If the rope has been coiled, the ends of the rope are wrapped tightly around the loops of rope before a loop is placed over the upper section and the ends of the rope pulled through. Now the process is the same as the above: The rope is placed on the climber’s back, the ends of the rope are placed over the shoulders onto the chest, threaded back diagonally under the armpits and then pulled through from behind again and tied together.