No bookmark
Subchapter Rescuing a companion

RESCUE TECHNIQUES

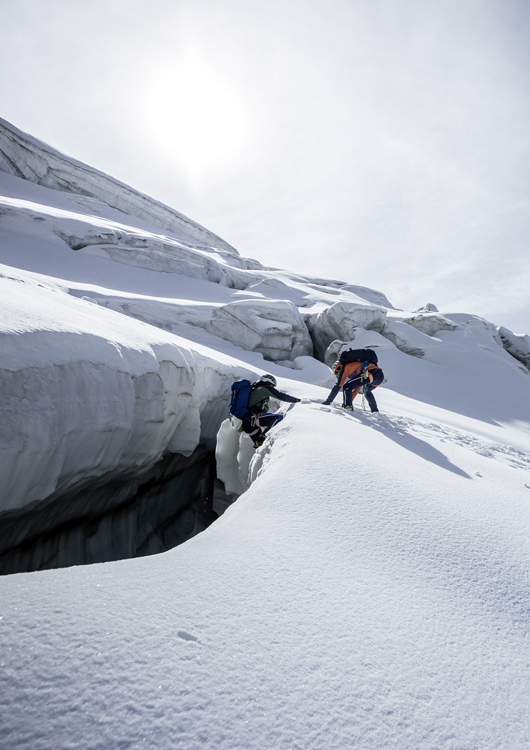
In glaciated terrain you need to be prepared for a crevasse rescue. Rescue techniques are fairly demanding, but when you have mastered them and can act quickly and assuredly in an emergency, a crevasse fall will not usually be too serious.

Choosing the rescue method depends largely upon the number of members in the rope team – as well as upon their knowledge. Ideally, all members should be able to free themselves from a crevasse using self-rescue techniques. However, they should also at least be familiar with hauling and pulley rescue.

A fall generates high forces. So it is important to react immediately and to rapidly adopt a braking position. Then the rope team should remain calm and jointly agree upon the appropriate steps to be taken.

Video

Rescue method: Pulley
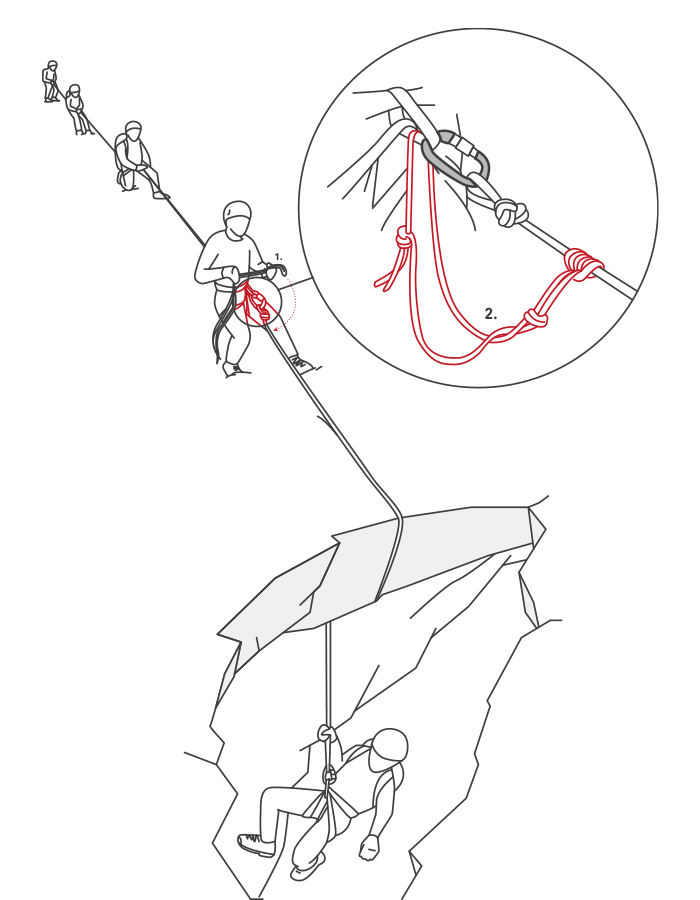
Pulley

For small rope teams (two or three people), the pulley system is used for rescuing partners. The pulley method halves the weight of the fall victim so that – in the best-case scenario – a strong partner can single-handedly haul a fall victim out. However, the technique calls for a number of items of equipment: sufficient spare rope, accessory cords, carabiners and a self-locking pulley.

A redirect pulley with reverse lock (such as Petzl’s Micro Traxion) reduces friction and will thus enable optimized force transmission – which makes hauling easier for two-man rope teams in particular.


Step 1 Step 2 Step 3 Step 4 Step 5 Important
Arresting the fall

In the event of a crevasse fall, the fall victim should be held or arrested as quickly as possible. Team members should throw themselves to the ground to lower their center of gravity, digging boots, ice axe or hands into the firn.

While the person at the rear keeps the rope under tension, the front team member (the person nearest the crevasse, green helmet) sets up an anchor to transfer the load – this may be a t-slot or ice screw anchor, depending upon the terrain.

Building an anchor

To provide greater freedom of movement, the person at the rear takes the full load and the person at the front ties a medium-length Prusik to the load line – with an over hand knot directly after the Prusik knot. The Prusik loop is then clipped directly into the belay loop on the harness using an over hand knot. Now the person in the middle of the rope team can unclip from the rope, still protected via the Prusik. He now has greater freedom of movement to dig a t-slot anchor.

Now the person in the middle (green helmet) must build the anchor (t-slot or ice screw), before transferring the load using a sling that is fed through the loop of his tied in Prusik.


Making contact

The person at the front clips his roping up knot into the carabiner on the anchor as backup and takes up position beside the anchor (standing or sitting), with his personal anchor under tension, creating a secondary anchor. The person at the rear (blue helmet) can now slowly transfer the load to the anchor. He unties the spare rope, and (also protected by a Prusik loop) cautiously approaches the crevasse, untying any brake knots along the rope. He then begins setting up the pulley.

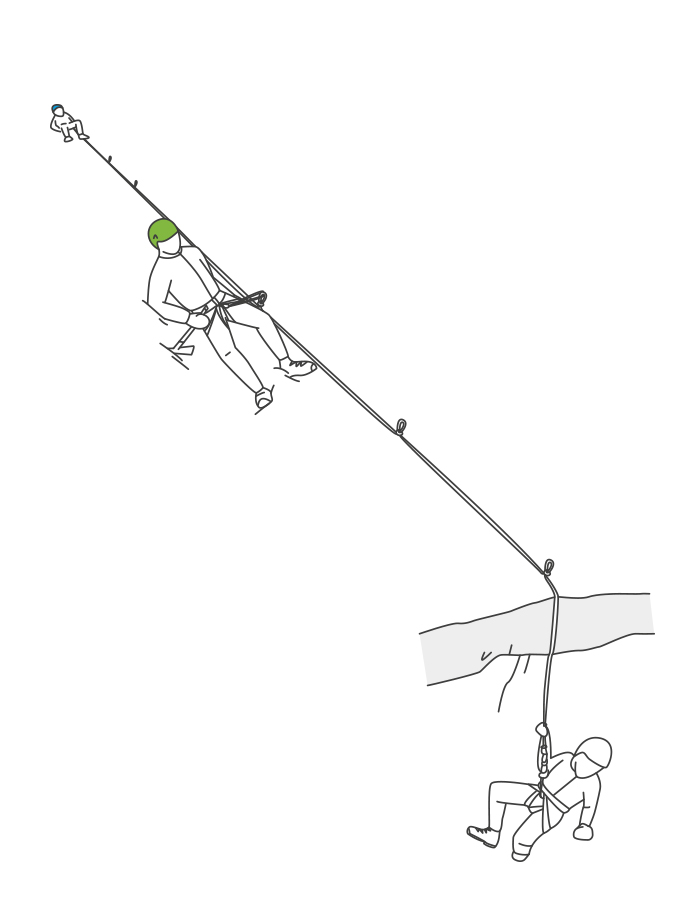
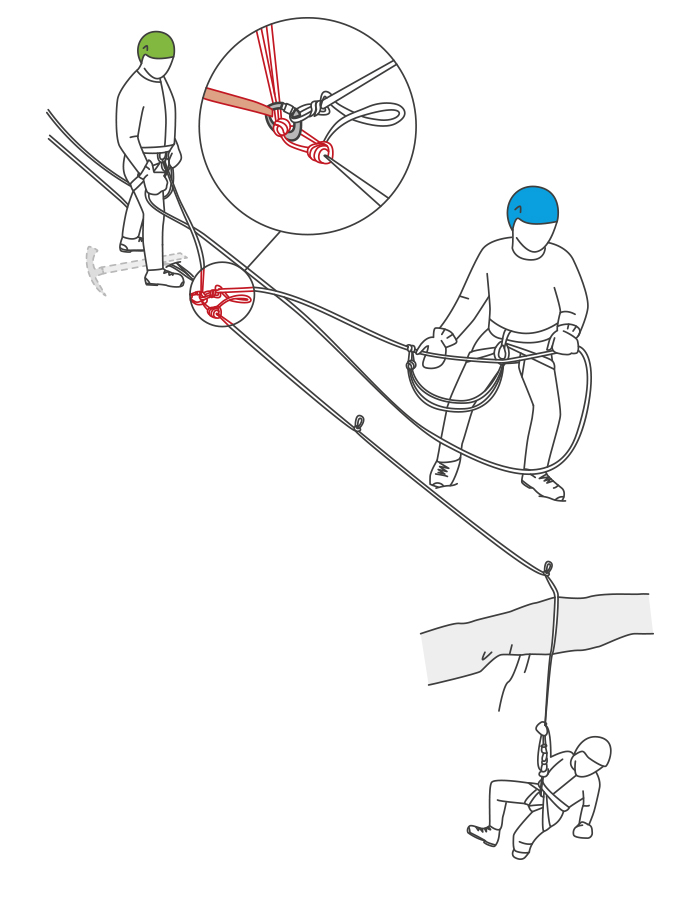
Setting up the pulley

After making contact with the fall victim, he lowers the spare rope – doubled into a loop with a locking carabiner clipped in.

The ideal equipment to use is a rope clamp with integrated pulley (e.g. Micro Traxion). This has both a pulley to reduce friction and a reverse lock mechanism.
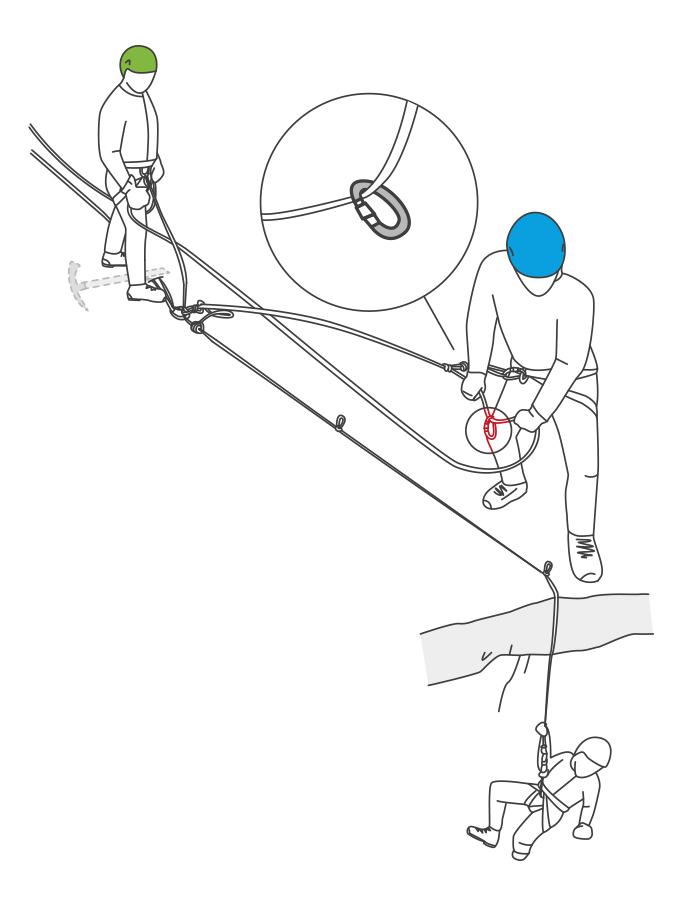
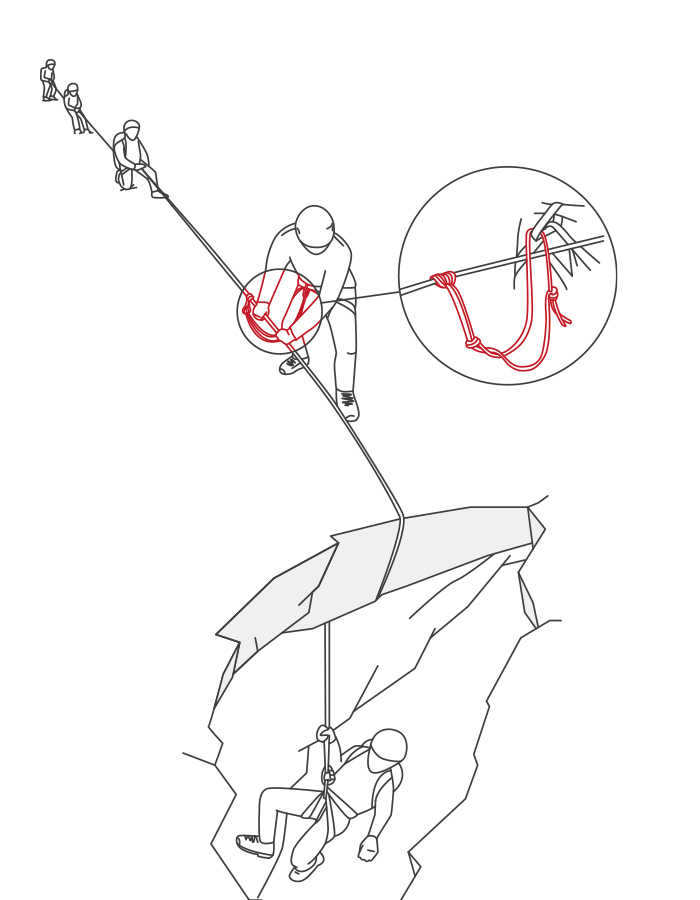
Rescue

The fall victim clips the carabiner and rope clamp with pulley into his belay loop. The rescuer at the lip of the crevasse and person in the middle beside the anchor can now begin hauling.

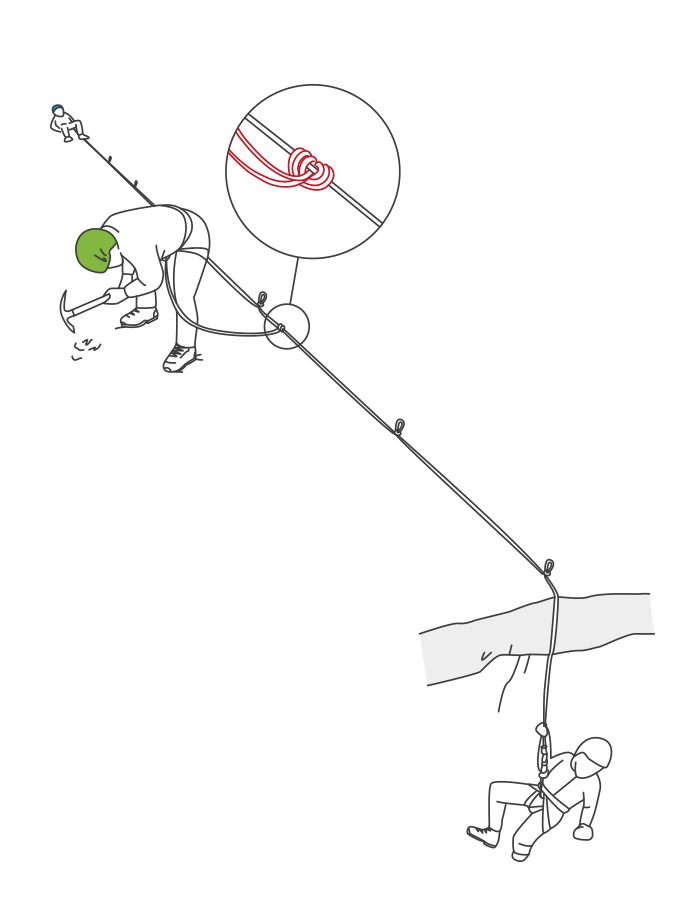
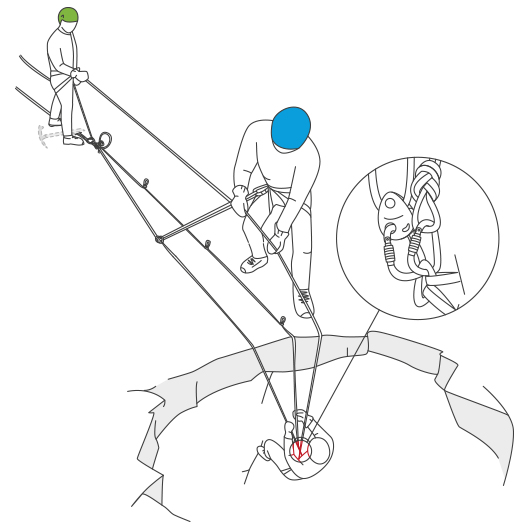
If the rope team has no rope clamp with integrated pulley, the free end of the rope must be secured from reversing by tying a Prusik loop around it and clipping this into the locking carabiner of the person at the lip of the crevasse (blue helmet).

The rope partners must then haul the fall victim out little by little. The reverse locking Prusik is pushed forwards after each pull.

Lip of the crevasse

As the fall victim gets closer to the lip of the crevasse, hauling should slow down and be gentler: there is a very high risk of injury at the lip of a crevasse.


Video

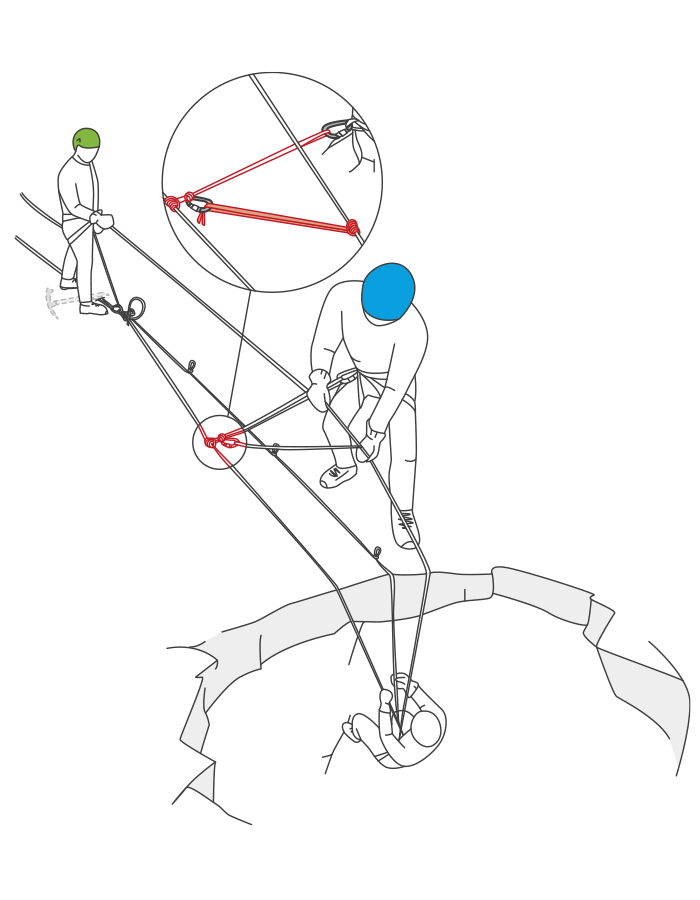
Rescue method: Hauling

Hauling

With larger rope teams of at least four people, hauling is the quickest, simplest and most common rescue method. The principle is very straightforward. The fall victim is pulled out of the crevasse by the remaining members of the rope team.

Step 1 Step 2 Step 3 Step 4
Arresting the fall and load transfer

In order to hold the fall, other members of the rope team should arrest it as best as they can. With larger rope teams, it is often sufficient to adopt a secure stance. Now good communication and coordination are required: The person closest to the lip of the crevasse ties a Prusik knot using a 5–6mm accessory cord around the rope and attaches it with an over hand knot to his belay loop. He then signals to the other rope team partners that he is about to unclip from the rope and that they must now take up the load


Making contact

While the other members of the rope team remain in position and hold the fall victim, the person at the front uses his Prusik hitch to approach the lip of the crevasse, where he makes contact with the fall victim.

Hauling the fall victim out

At the lip of the crevasse he places an ice axe under the rope to prevent it from cutting further into the lip. The ice axe is secured by tying it to the Prusik loop with a sling.

On the command of the person at the front, the remaining rope partners now walk backwards and carefully haul the fall victim out.

Getting over the lip of the crevasse

The final challenge is to haul the fall victim over the lip of the crevasse. The closer the fall victim gets to the lip of the crevasse, the greater the care required. To haul the fall victim over the lip of the crevasse, pull cautiously and allow the fall victim to lean back and try to climb up over the lip using his feet.

If the group is in a heavily crevassed area and, therefore, not able to walk backwards safely, each person should secure themselves using a Prusik and haul the rope while standing on the spot, sliding the Prusik forwards with each pull.